
How to paint UPVC windows
Painting upvc windows is by far my favourite budget diy. It requires very little skill or concentration, is quick to do and at very low cost (often free if you already have the paint leftover from painting the room) can still completely transform your windows and elevate the space.
We live in a 400 year old thatched roof which is not listed and therefore has, at some point, been given all upvc windows. Whilst I love the warmth they provide, they are not in keeping with our home and so over the years, I have set about painting them both on the inside and outside. They are now often mistaken for wood!
Paint for UPVC windows
One of the most frequent concerns about painted upvc is whether the paint lasts. We have a very busy family home with three young children and often hosting, having people staying over, even letting our house out for free to friends when we’re on holiday… so I’ll feel like I’m in a good position to vouch for the hardiness of painted upvc windows and am happy to give an honest account.
As with any paint job, painted upvc will not last forever. I have found our windows have held up brilliantly and pretty much look good as new years after they were painted. Some paint has been better than others, which would probably be the case if you were painting wood too.
They have all been prepped the same way, but out living room windows finished in an eggshell by Fenwick & Tilbrook still look incredible despite them getting a lot of traffic and grubby little fingers nearby in the busiest room in the house. The windows I painted in a deep magenta in our bedroom (using Dulux Heritage eggshell) have not held up so well, however I used a different colour Dulux Heritage eggshell in the toy room and that’s been fine. Other paints I have used include a Leyland’s Acrylic Eggshell (brilliant) and on the windows and door outside, I used Zinsser All Coat Exterior Matt (also brilliant) which you can get colour matched to any brand of your choice.


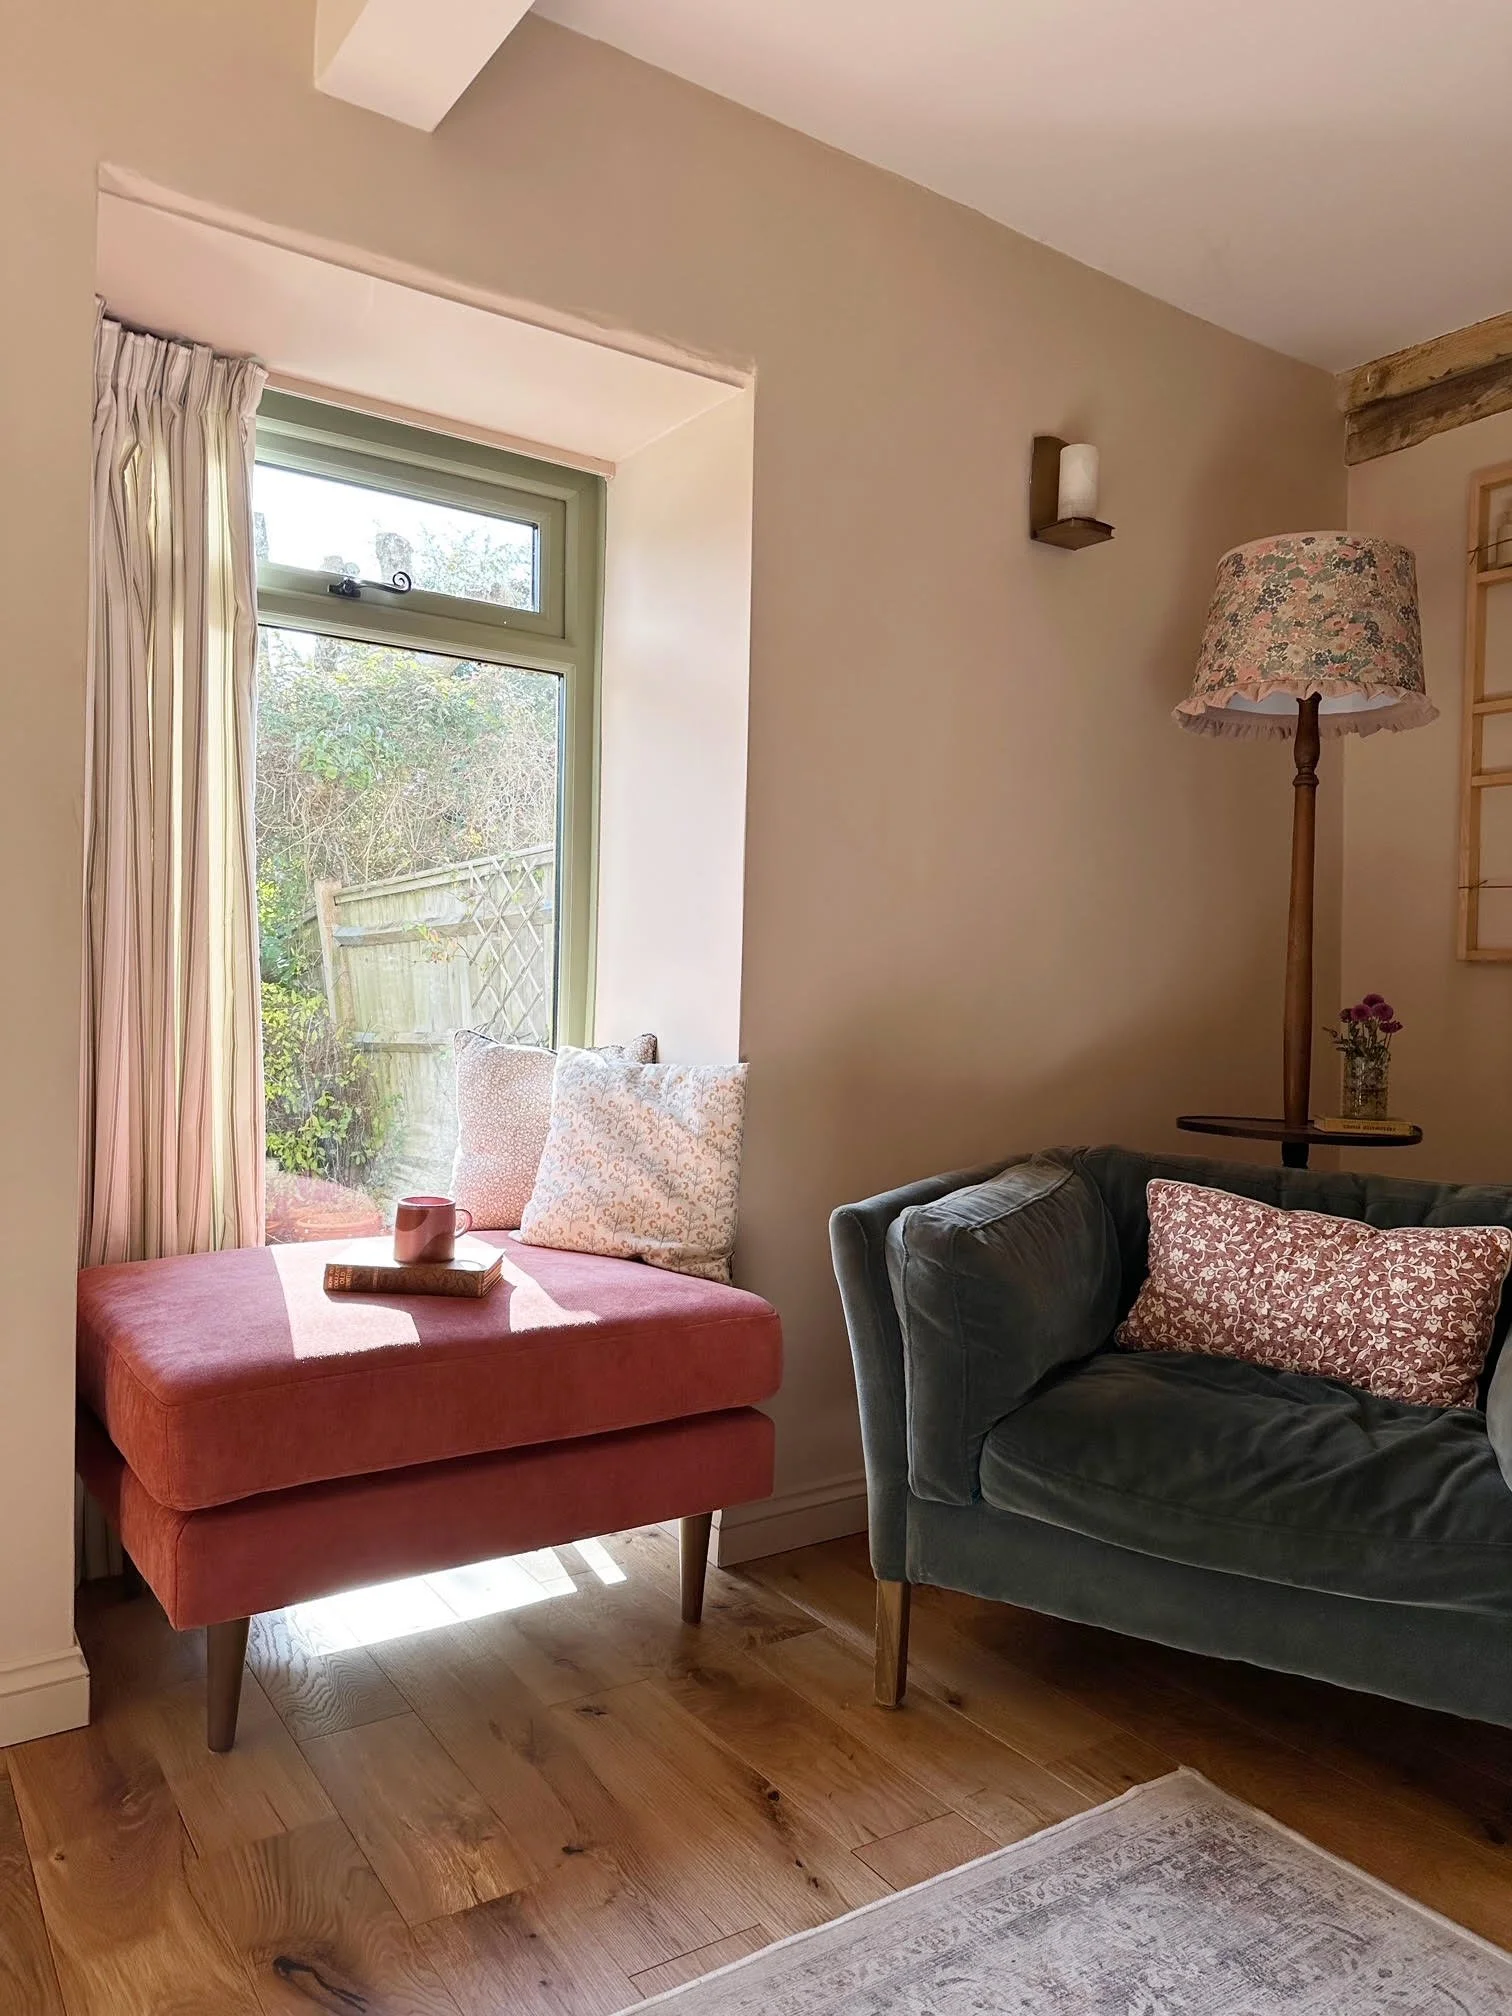
Living room upvc windows painted in Fenwick & Tilbrook Eggshell in ‘Cley’. Find out sources for everything else in the living room here.
Painting UPVC doors
As for doors which inevitably get more traffic and knocks than a window, I painted our two back doors at the same time. One is wood and one is upvc, both exposed to the same amount of weather, and I can honestly say after three years, they both look as good as each other. A few scratches here and there but there is certainly no obvious difference between one type of paint job (on the wood) holding up any better than the other (on the UPVC).
I think they have another year left in them and then I will maybe give them a new lease of life. But after four years of enjoying the gorgeous yellow outside compared to the depressing brown, I have no complaints. It’s such a job worth doing!


Exterior UPVC windows painted in Zinsser All Coat Exterior Matt colour matched to Little Greene’s ‘Yellow Pink’.
Tool List:
Good quality primer like Zinsser Bulls Eye 123
Eggshell (interior) paint in your colour of choice or
Exterior paint like Zinsser All Coat Exterior Matt (which you can get colour matched)
Blade for scraping paint (if using that method)

Bedroom UPVC window painted in Dulux Heritage Eggshell ‘Florentine Red’. If you want to see the full bedroom transformation, read the blog post here.
How to paint upvc windows:
Clean the windows thoroughly to remove any grease marks or stains. I had good success with The Pink Stuff for some stubborn marks but regular sugar soap will probably work just as well.
Tape up the window to avoid getting paint on your pane of glass, or, some people prefer to do the paint and scrape method (where you don’t use tape but scrape the paint carefully off the glass with a blade afterwards). I have used both methods and personally prefer to tape up, but I think they both work well, so it’s up to you! Taping requires spending more time in the prep stage, painting and scraping requires more time in the clean up stage.
Use a really good quality all surface primer. I swear by Zinsser Bulls Eye 123 (the blue tin) as it is hardwearing, can be used indoors and outdoors, you can paint over it in 60 minutes, it’s water based so brush clean-up is easy and of course, that makes it not too stinky either. It’s not cheap but worth it for a good job well done in my opinion - and one tin lasts ages!
Paint 2-3 coats of your top coat. It’s best to do a few light coats than one thick coat of paint. Watch out for drips, especially at the corners where the paint can gather.
Once your last coat is done, remove the tape. Or, if you’re scraping the paint, wait for the paint to dry before scraping with a flat blade. You can either get a specific tool for this task or you can take the blade from a Stanley knife or craft knife - just be careful of your fingers!
Leave the paint to cure and harden fully - ideally 72 hours if you can! Paint becomes more hardwearing as it dries out and even if it feels dry to the touch, remember it will be more susceptible to scratches and scuffs in the first few days.

The original estate agent pictures of the girls shared bedroom before we moved in,

How much brighter does the space look with the windows painted the same colour as the walls? See the latest updates on this room including new curtains, carpet and skirting, here.