
How to paint decorative furniture for beginners
AD - This post is a collaboration with Brewers but all thoughts are my own.
As interior trends shift towards more traditional, and maybe a somewhat whimsical aesthetic, we are seeing a rise of hand painted vintage furniture popularised by talented decorative artists and illustrators who use repetitive pattern, small botanical shapes combined with stripes, spots and soft geometrical patterns.
I have loved watching these pieces evolve, from picture frames to wardrobes, bedside tables and mirrors, pioneers of the craft like decorative artists Tess Newall and Felicity Buchanan have opened up a whole new level of upcycling which many, including myself, are enjoying having a go at.
Over the years I have had a go on a smaller scale, upcycling picture frames with simple patterns and motifs, but I have always wanted to have a go at something larger. I love a project that is repetitive (and often time-consuming) because once you get into a good rhythm with it, you don’t particularly have to think so the process feels rather therapeutic.
I bought this cupboard second hand for £50, and whilst it had a pretty shape, it was painted cream and looking tired and I wanted something with a little more impact. Brewers Decorators Centre has been a trusted go to of ours for years (it’s not just for trade - anyone can purchase items there!) and so I headed to my local store to check out their Albany paint range. I love the large brushout boards making it super easy to choose the colours I wanted. Their colours also come in an acrylic eggshell finish which is perfect for woodwork.

I painted up the samples on to old calendar pages (I keep all my calendars for this very reason as they’re card so more durable, and now I have a wonderful stack of painted samples I keep for future reference) and took time considering which colours to use.
The cupboard is situated in our hallway which is fairly neutral. I was naturally veering towards the gorgeous Albany ‘Mulberry Lane’, however as there is a lot of wood in the hallway and I felt like some contrast was needed from the reddy/brown tones. I have a large bookshelf on the stairs in a bright golden colour and there is a door to the left of the cupboard in a colour similar to the wonderful Storm Blue which unfortunately ruled that out as an option too.

In the end I went for these beautiful greens for the base colours, using the darker shade, ‘Jevington’ for the main colour and the lighter, ‘Winslade’ for the inside shelving and doors. I then chose the lovely red from above, ‘Mulberry Lane’, the yellow, ‘Thatcham’, and the soft white, ‘Chesil Beach’ for the floral detail alongside more of the Winslade. All paint colours in Albany Acrylic Eggshell.

How to paint furniture with hand-painted decorative detail
Tool List
Paint Brush 4”
Small detail brush
Sandpaper 80 grit
Pencil
Prime and Paint the Base
If your furniture has been painted it’s ideal to start off by giving it a good sand with 80 grit. If the piece is bare wood, you will need to prime it first. I recommend Zinsser Bullseye 123 but if you talk to the experts in store at Brewers, they will be able to advise you on the best primer for your surface.
If you are priming bare wood, you may find that the wood feels a little rough as sometimes the primer can raise the grain in the wood (this also happens a lot when painting MDF.) If this is the case, you will get a smoother finish if you lightly sand between coats with 240 grit which I know feels slighter counter-intuitive to sand after you’ve painted a coat but it really will make a big difference. Obviously don’t sand after the very final coat!


Hand-painted Detail and Pattern:
Inspiration
This is the bit which you may find intimidating. Watching all these incredible artists create the most intricately detailed patterns can certainly make this look feel out of reach. I’m not taking anything away from their skills, because obviously the standard of work they create is incredible, but many of these patterns are doable if you break them down bit by bit.
I love looking on Pinterest for inspiration and experimenting with multiple shapes and pattern repeats that I see. When you look at the patterns others use, some of them are, of course, very complicated, but others consist of simple geometric shapes like circles, stripes and scallops or botanical shapes like leaves, flowers and buds.
Design Planning and Prep
You may find you want to sketch out your design roughly on some paper first, and I also painted a few versions of the patterns on my sample card so I could work out the best colour combinations. I also wanted to test I could actually paint it first before committing to the furniture!
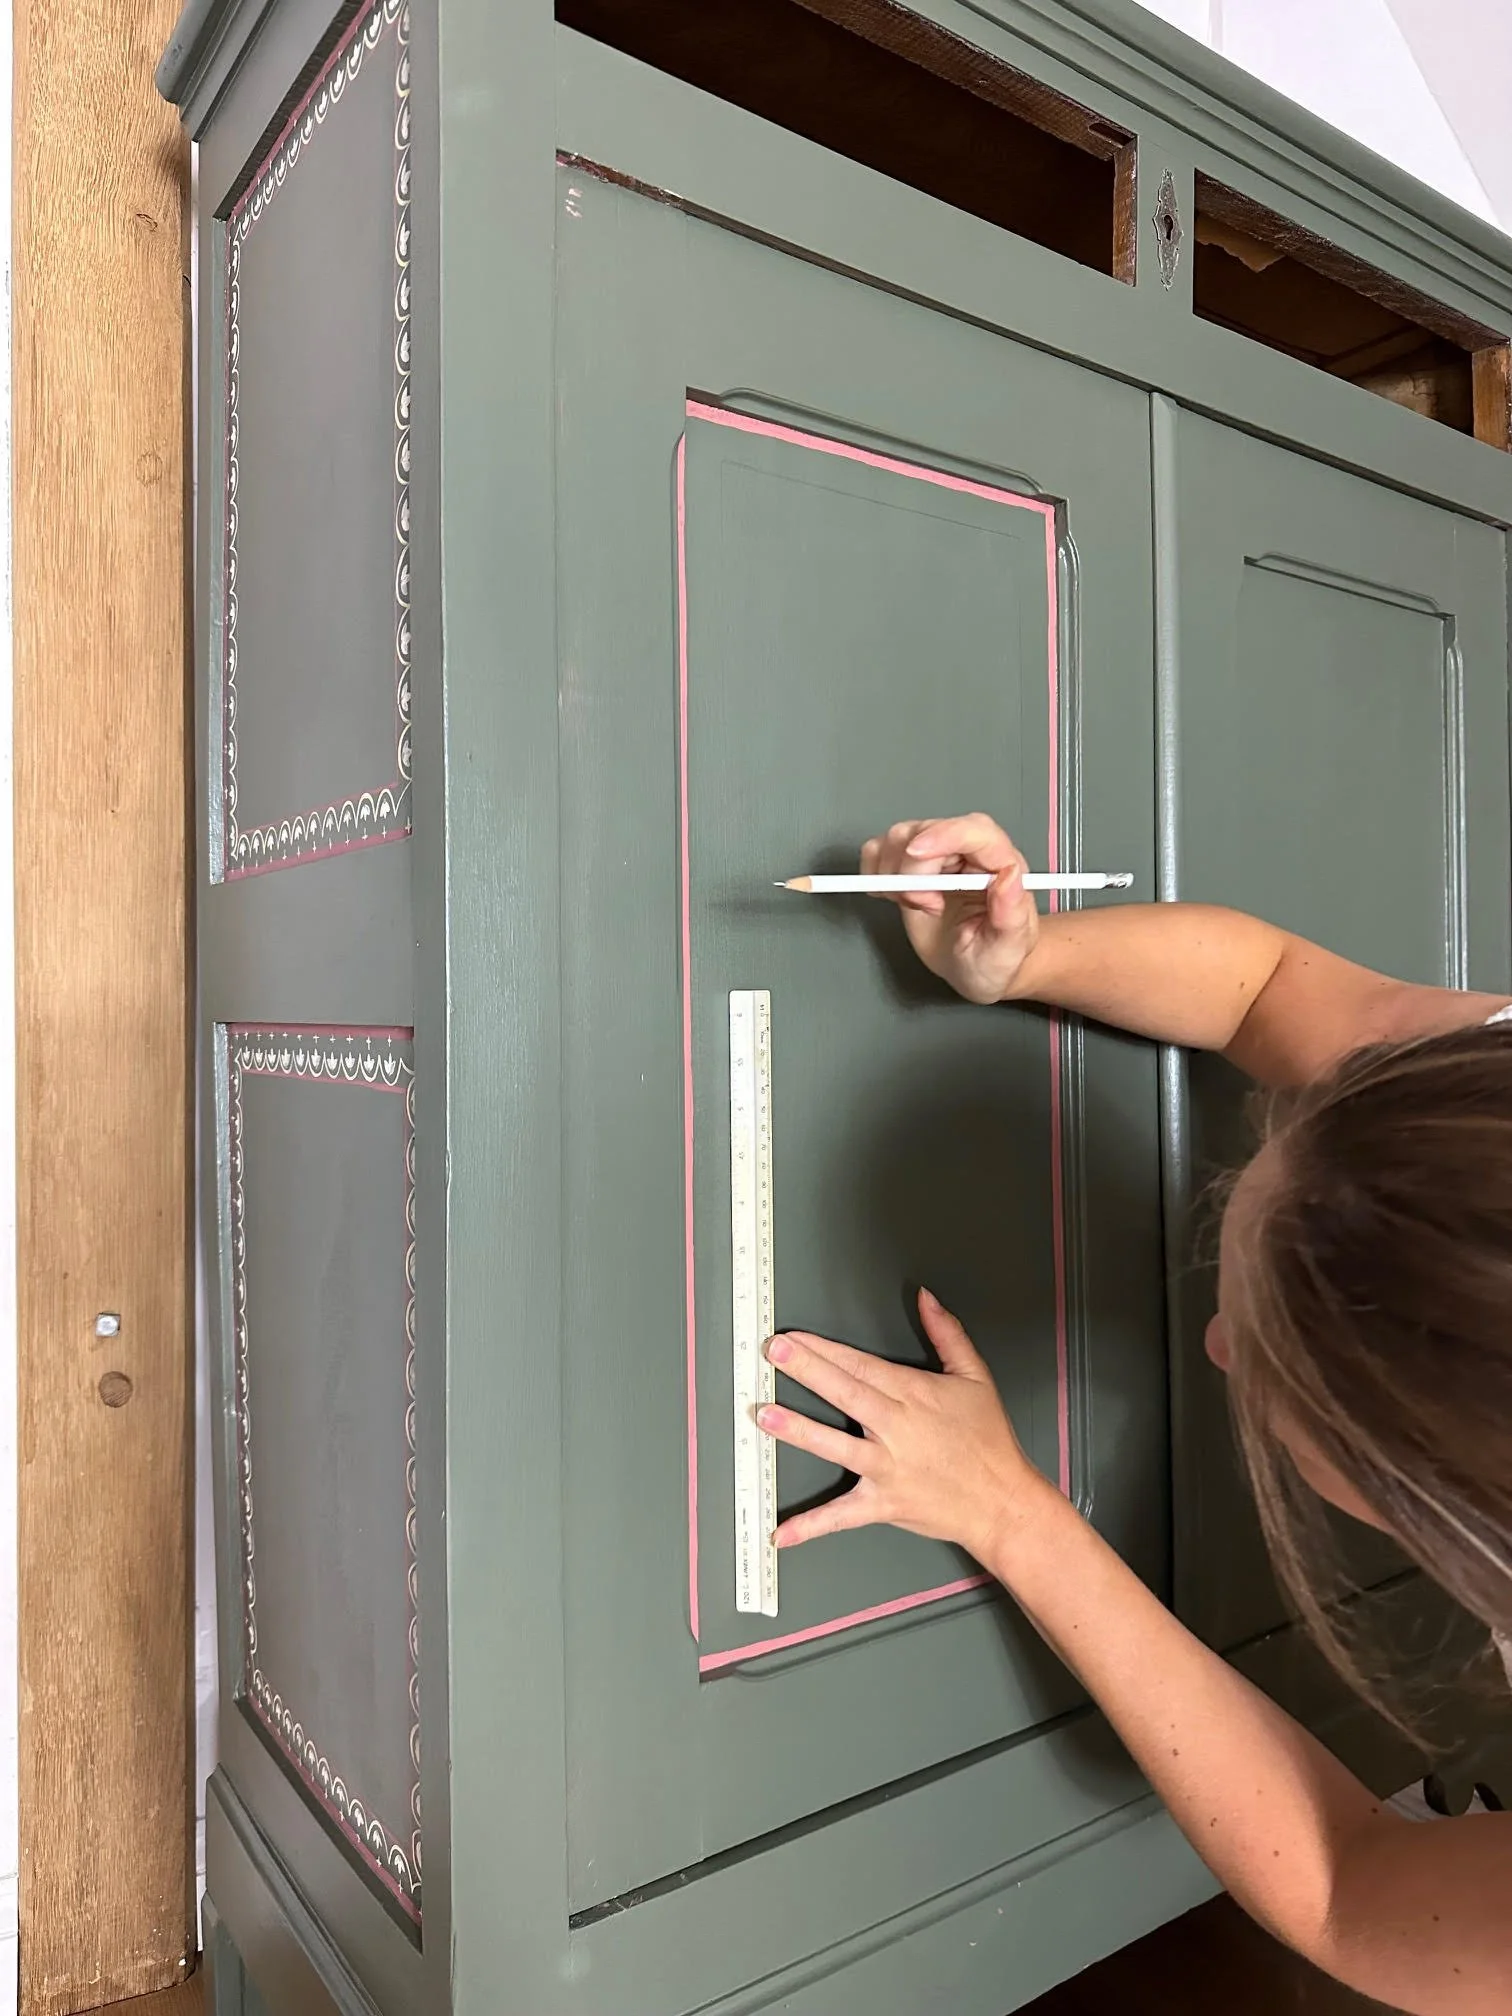
Whilst each individual component of the pattern doesn’t need to be perfect, you will find that the overall look will work so much better if everything is evenly spaced out and the central line of the patterns are parallel or symmetrical (if you’re painting drawers or cupboard doors in a repeat pattern). There are some elements you may feel confident enough to paint free hand and there are others you will want to sketch out first. For reference, I measured out the lines for the red square around the doors but the rest of that pattern was painted free hand. In hindsight, I wish I had spent more time measuring out the scallops so they are more uniform, however that would also have taken me ages so maybe it’s a good job I didn’t!
I was much more thorough with the pattern on the drawers and middle of the doors though, measuring those out so the spacing is the same and using a pencil to lightly mark the outlines of each shape.

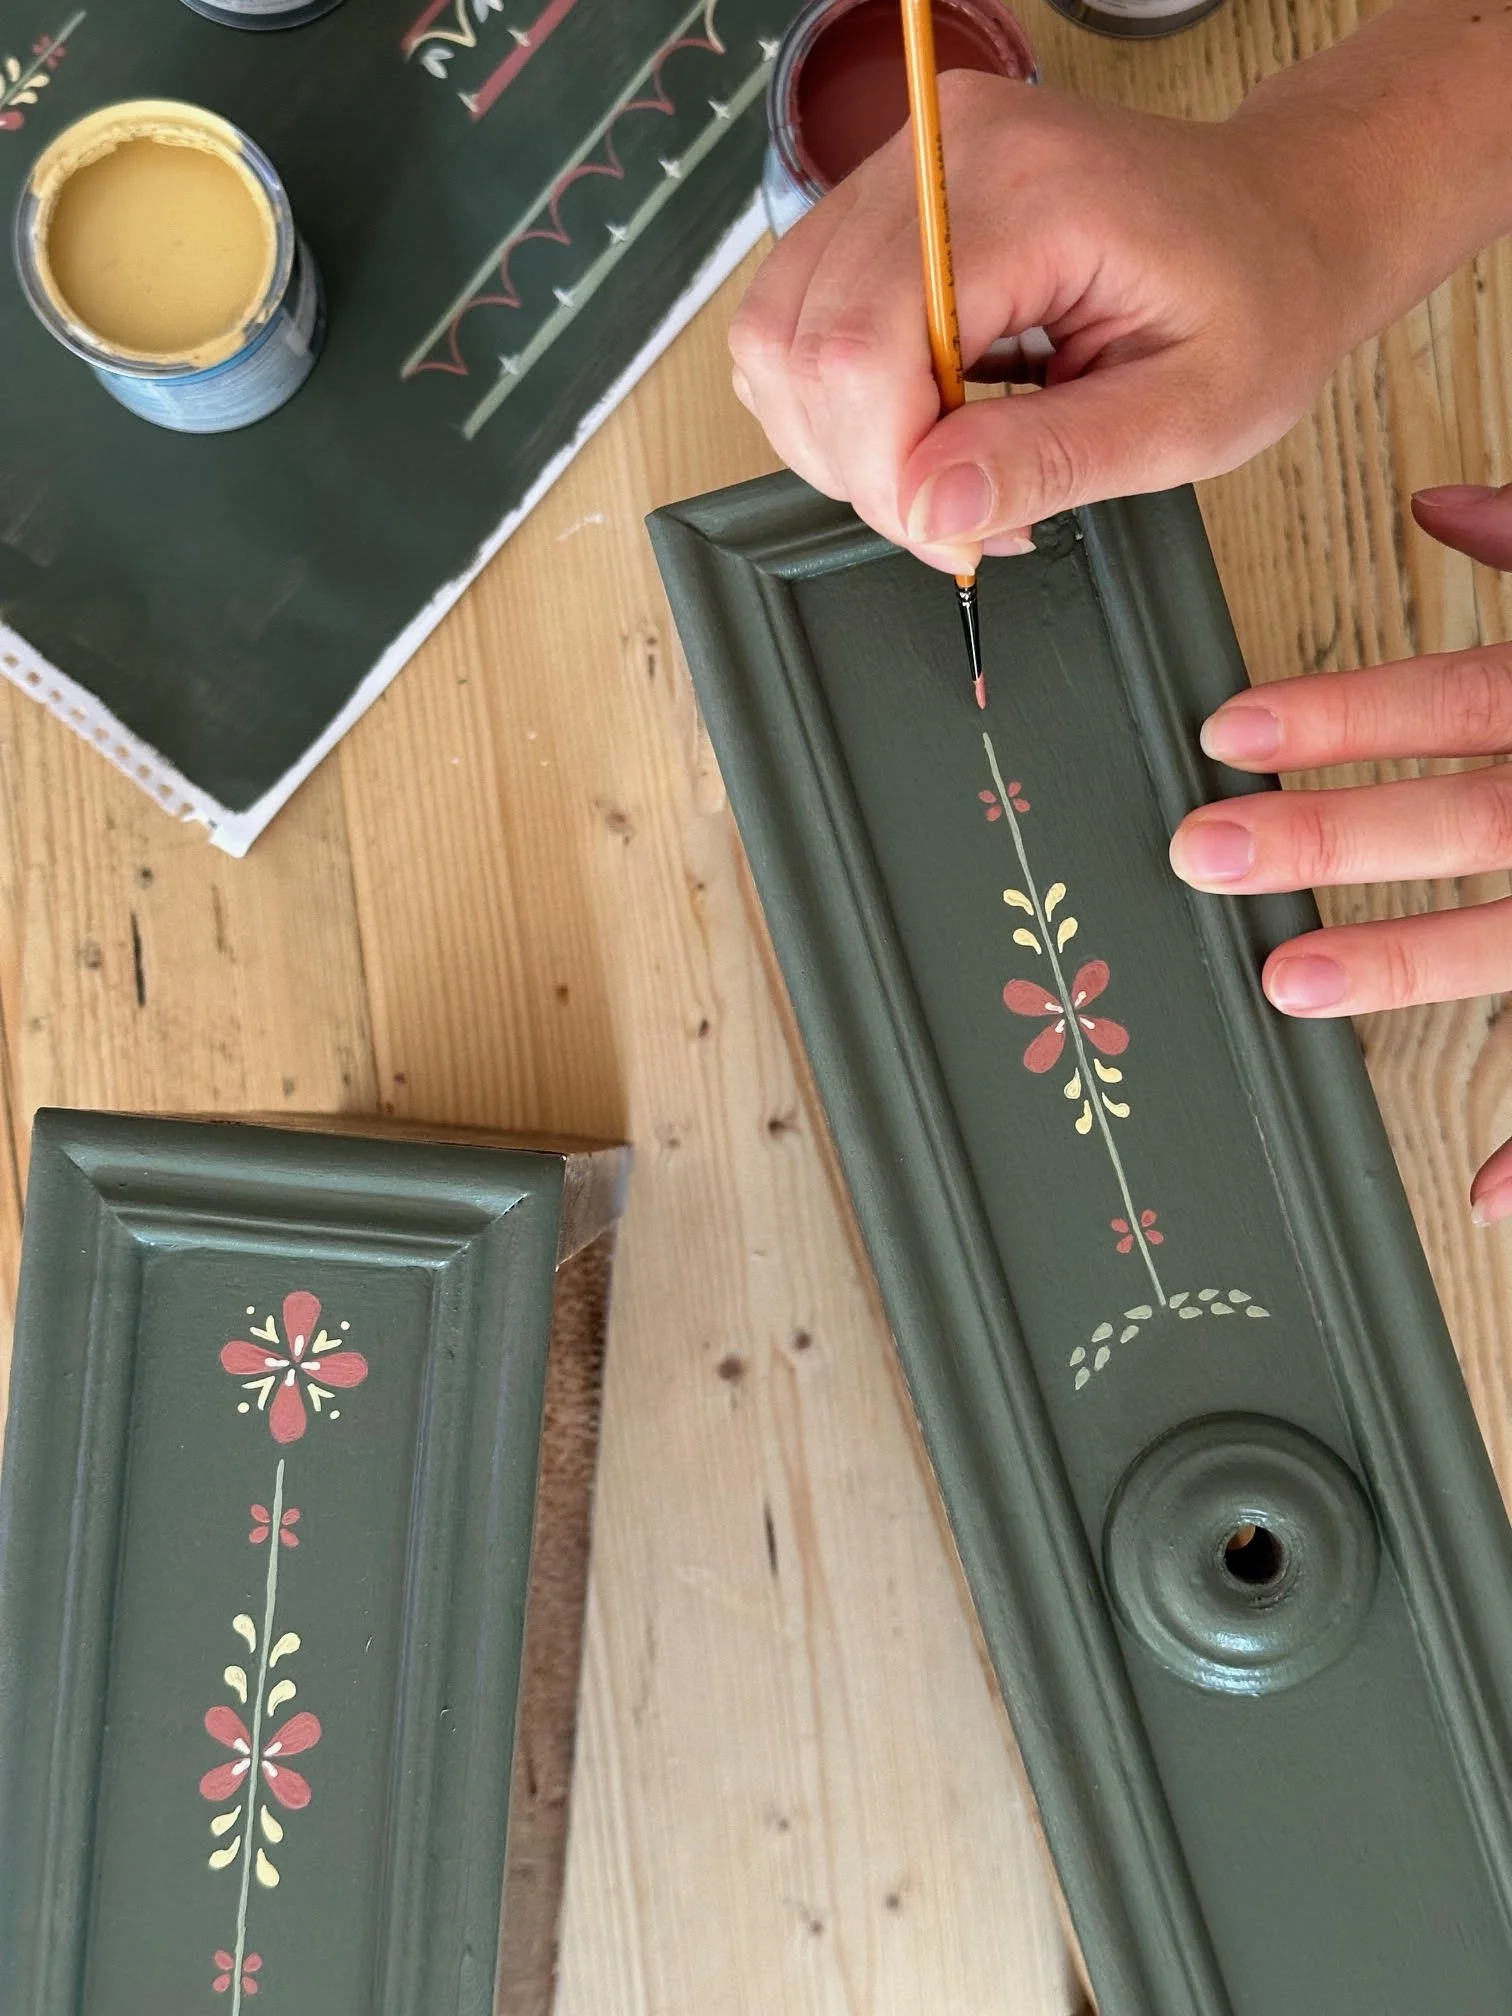
Hand-painting your design
Treat yourself to a lovely new paintbrush, ideally a really small one. I used a ‘0000’ although next time I think I may try using one size even smaller.
If you’re using paint from tester pots, you may find it is a little thick and hard to get your paint brush flowing nicely so add a little water to get a lighter consistency. You can always layer up the paint to get the colour density you’re after.
If you make mistakes I found dabbing it lightly with a wet wipe whilst the paint is still wet will remove it, then just wait for the base to dry before painting again.

The Finished Piece: My first ever hand-painted decorative furniture!
I am so happy with the finished result. It’s not perfect of course and I’m sure your first attempt wont be either, but the overall look is effective and no one else will be scrutinising every single leaf like you will.
Whilst I did a bit of art at school, I haven’t painted anything other than walls, ceilings and furniture for years, so I am in no way an expert at this. If I can do it, you can!


As we don’t have a utility room, this cupboard holds my tool bag plus other tools I use most frequently. Everything else is stored in the garage, but whilst we’ve been renovating this house for almost four years now, it’s always handy to have some things easily accessible.
I love the juxtaposition of the hand-painted decorations with the items stored inside it, I don’t think many people would guess this is a tool cupboard! The inside of the doors and shelving were not in a great condition so I painted them with Albany ‘Winslade’.


Do you feel ready to hand paint your own decorative furniture?
I hope more than anything that this shows you don’t need to be a professional to get this look. It’s all about trial and error and tackling it step by step so you don’t get overwhelmed. If you haven’t painted much, practice first to see if your pattern is doable. And remember, it’s all about the overall effect, not every single shape or leaf being absolutely perfect.
Let me know if you have any questions in the comments below!