Posts tagged Before and After
Ikea Play Kitchen Makeover

Our Ikea Duktig kitchen is definitely our most played with toy. With two girls under five, it has been well loved for over four years and was beginning to show a few signs of looking tired. I've always wanted to upcycle it, and over the years have had various designs in mind, but renovating two houses and a house move took priority over less essential (but way more fun) projects like this one.If you've been following me for a while, you'll know we have given our real kitchen a temporary update, whilst we save for an extension. This project, therefore, gave me a chance to put my plywood and ribbed wood dreams into real life, albeit on a smaller scale!! It has also meant I had a chance to change two of the only things I found impractical about the play kitchen - the fact that all the toys fell down the back, and the plastic hooks which the kids constantly pulled off and scattered around the house.

Read More
A quick budget kitchen makeover

After a long drawn out moving process, which had many setbacks along the way, we were absolutely itching to crack on with the renovation as soon as the keys were in our hands. We plan to extend the kitchen and utility room one day, so whilst we've invested in replastering and new electrics in the rest of the house, this temporary makeover was always going to be about being simple, quick and super cheap. We just needed to make it liveable for 3 years or so.The only proplem there is...There was lime green EVERYWHERE.

Read More
Our small family home: A full house tour

The time has finally come to say goodbye to our first home, our beautiful little Victorian mid-terrace house with the yellow door. We have had so many wonderful memories here, including bringing our youngest daughter home at just 6 hours old, hosting parties, working together on DIY projects, watching both our children learn to walk and talk, and, of course, I am very grateful to have been able to call it ours. However, it is almost two years to the day that we decided to move on so, honestly? My heart has not been here for a while. It has been with the other three houses we've tried to buy along the way, it has been dreaming of driveways and downstairs toilets and space for dishwashers. We were completely content with our situation, but as soon as our head was turned by something different, I'm ashamed to say our patience for the little niggles mentioned above started to wear thin. Family life grew and two active children (potentially more one day?) require more than a couple with a baby who doesn't move.And so, to sign off our adventure in this home on the blog, I have curated a mammoth house tour for you full of all the juiciest before and after shots! We have learnt so much from the renovation - we made a lot of mistakes and compromised more than we would have liked to due to budget (we spent approx. £6500 in total for the whole house) but overall we have both really enjoyed the process. I hope you like it!

Read More
Our girls' shared bedroom with bunk beds

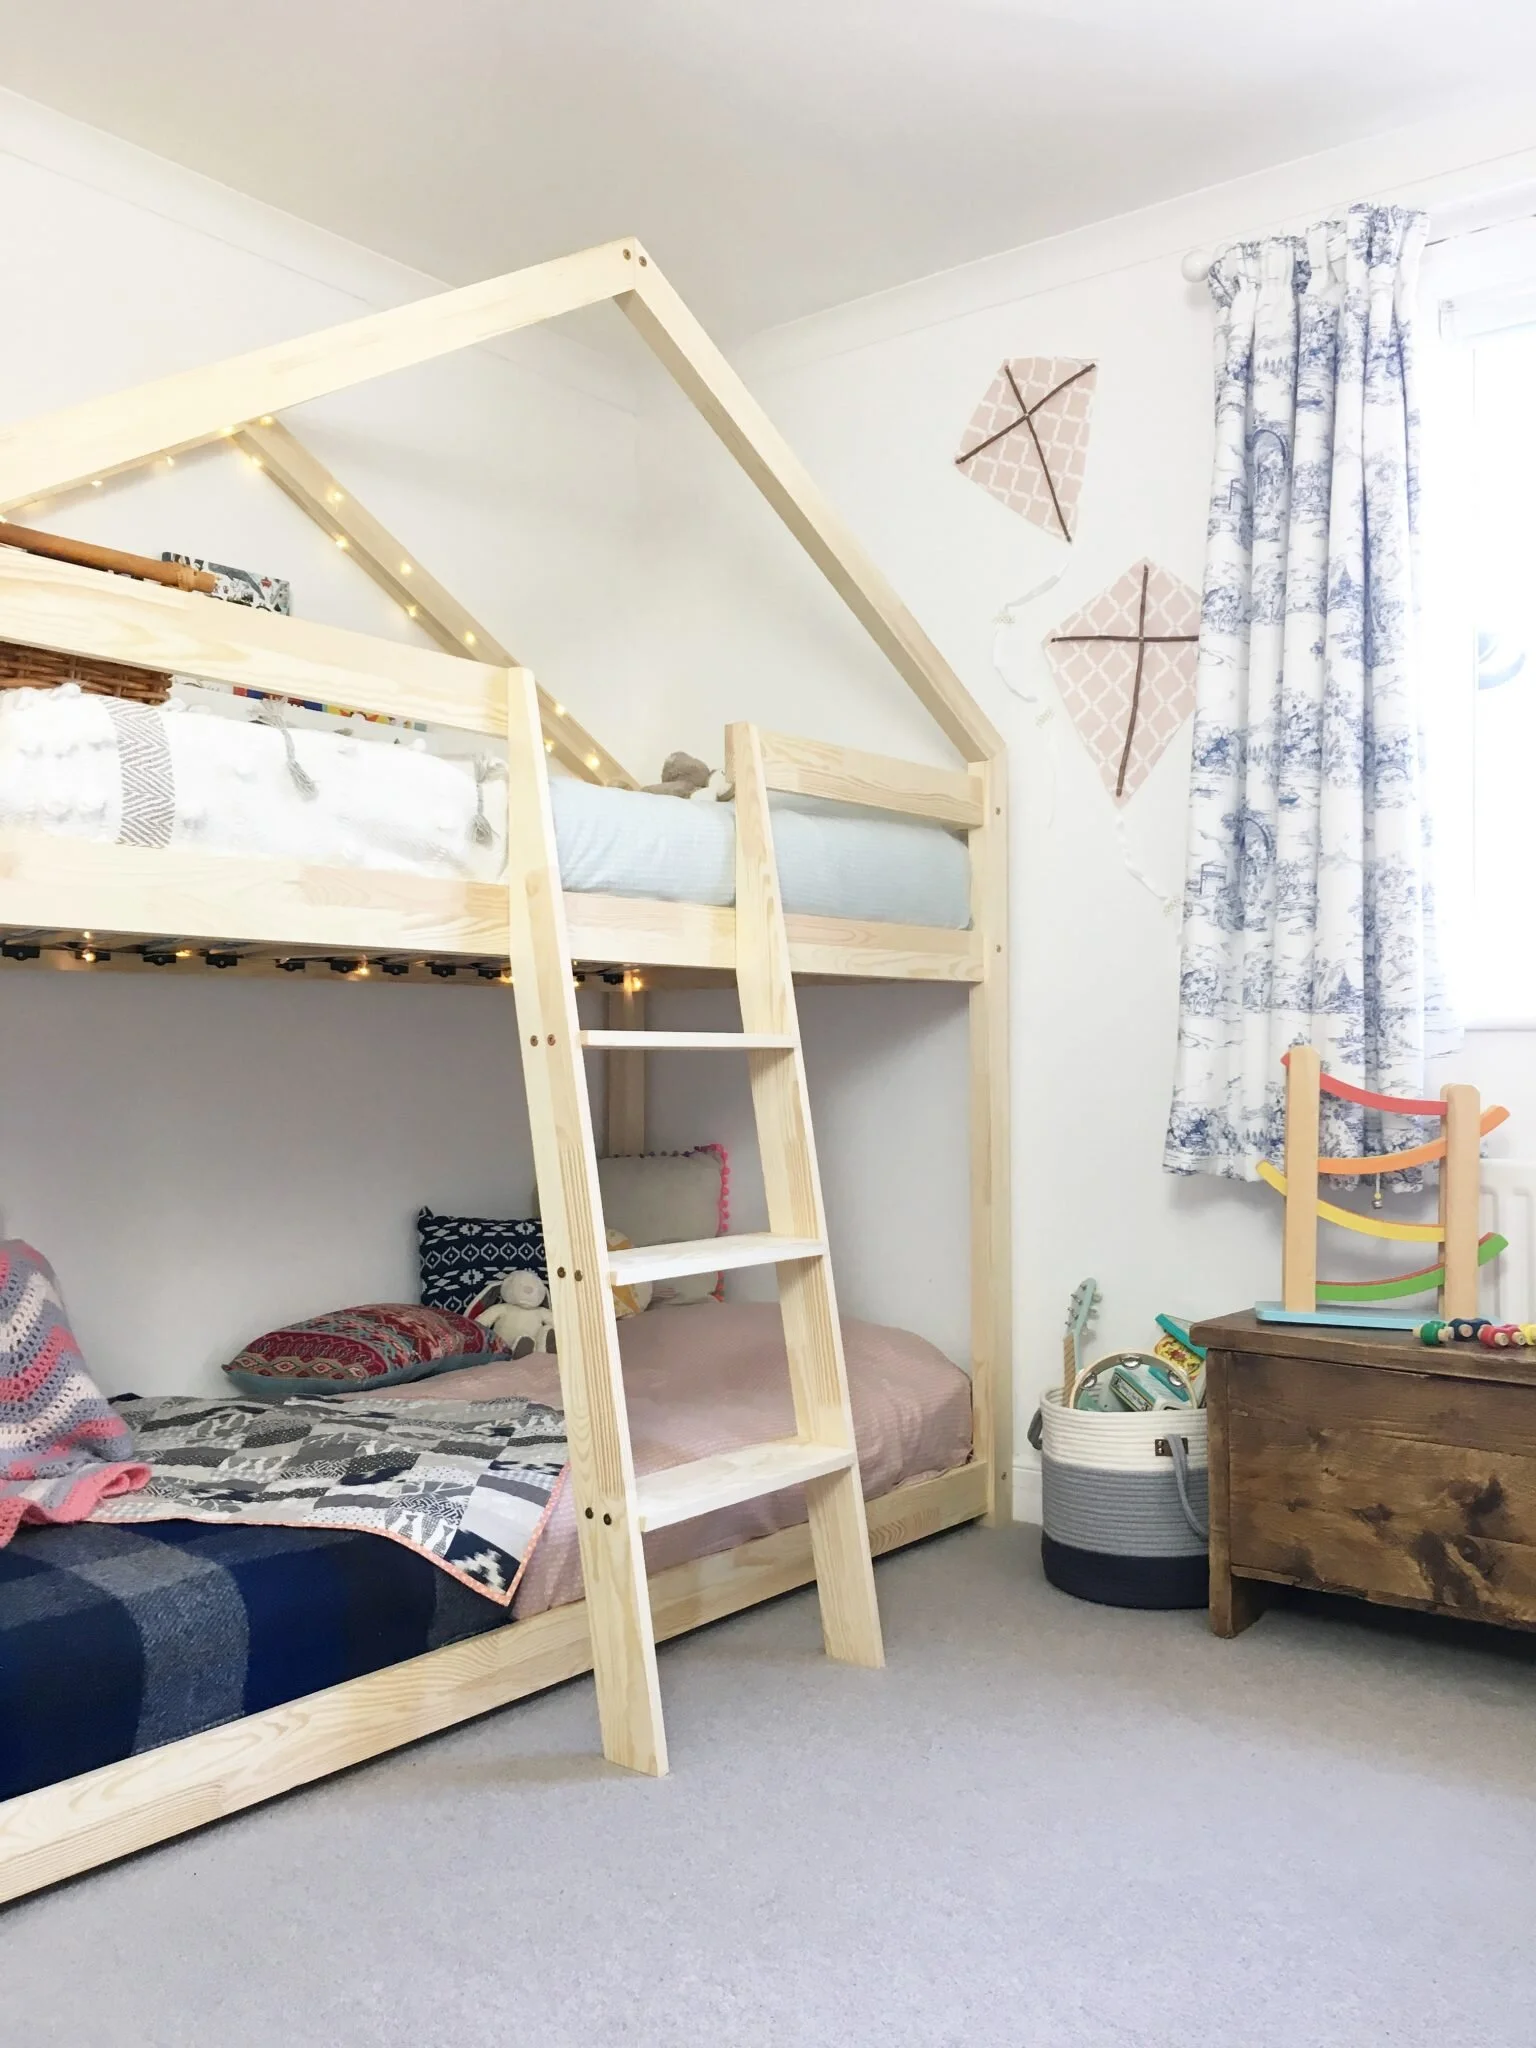
DISCLAIMER: These bunk beds were purchased by myself, with 50% off, in exchange for an honest blog post and pictures of the product. This is the first time I have collaborated on something like this so do let me know what you think and please ask me any questions you have about the bunk beds - all thoughts and words are, and always will be, my own!As our youngest daughter began to outgrow her cot, it felt natural to look towards bunk beds as a solution for our girls' shared bedroom. Not to mention our eldest daughter has been asking for them for a while now, and kept telling people, 'when we move to the big house, we're going to have bunk beds and I'm going to sleep on the top and Betty will sleep on the bottom...' I'm not entirely sure where she got that idea from as we never promised anything specifically, but our hope was to have bunk beds set up in the new house as a surprise when they arrived.Anyway, as regular readers of this blog will know, the house sale fell through at the last minute so we're still in our old house for the moment (you can read what happened here), but babies carry on growing, and cots don't grow with them, so we decided to find a new solution even if it meant building new bunk beds that we'd have to dismantle a few months later.Due to our youngest being only 20 months old, we were keen to get a bed with the bottom bunk bed close to the ground, which this house bunk bed from House About Kids does perfectly. The ladder is also on a slant, has handles and wide steps, which is perfect for our girls who aren't as physically confident as other kids their age. In fact, we visited a friends house at the weekend who have the Ikea Kura Bunk (another serious contender for us) but Darcey struggled to go up and down the ladder so I'm glad we didn't go for that one just yet. As the years pass, I also think this bed has plenty of room to reinvent itself . I'm looking forward to making sweeping canopy's, hanging plants, adding greenery and more fairy lights, maybe curtains of some sort for the bottom bunk, I could go on...! (**insert husband rolling eyeballs here**)

Read More
Our New Front Door: Before and After

I can honestly say it's the best £1000 we've ever spent.  We've never had a huge budget for doing up this house, but to spend 1/6 of that on getting rid of the old UPVC door and transforming our homes curb appeal was definitely the best decision we ever made.  I absolutely hated our old door, and I hate to admit I'm this shallow, but it genuinely made me feel embarrassed about the house.  We'd worked so hard on transforming the interiors, but 95% of people only ever saw that horrible plastic white thing more akin to a static caravan home than a Victorian cottage in the beautiful South Downs National Park.  I remember our first Christmas in the village, taking Darcey for a little walk in the pram to get some fresh air and coming home to Matt exclaiming 'I swear we have the only UPVC door in the WHOLE village, everyone has beautiful Christmas wreaths on their beautiful Farrow and Ball doors and ours is just BLEURGH!!!'  (You may come to realise I'm never one to understate my feelings...)

Read More
Our Girls' Shared Bedroom Makeover

It was definitely at the point where we had to strip the wall in the girls room right back to the original wood when I thought we were never going to achieve our three week deadline.  It was also the moment where I sent an urgent plea out to good friends requesting help with the decorating.  Quick!!! Darcey has to sleep in this room in 8 days!!!  PLEASE help.  Emotive? Guilty.  Using a baby to get you free labour? Guilty.  Desperate?  Hell to the YES.Due to previous damage and decay we had to strip this wall right back and our plasterers boarded it up for us and re-plastered.  It was an unexpected and unwelcome job but it had to be done and at least it gave us a bag full of wood perfect for kinder on the fire?! (Essential to clasp onto any positives you can whilst going through a renovation I think!)

Read More
The best way to get smarter storage in your small house

Before we bought 'The Otto House' we rented a large, detached three-bedroom house with an enormous studio in the garden.  Like many here in the South of England we had to downsize to get on the property ladder so storage has always been a bit of an ongoing challenge.  I am a curtain-maker by trade and not only used the old garden studio for making curtains but also for hoarding HEAPS of fabric, wallpaper, paint, magazines, books and anything else remotely crafty.  It was like a creative paradise to me and something which I am sure I will never have again, but I am so very grateful for the two glorious years I spent stitching away in there whilst the sun streamed through the double doors.  (And the winters spent in a coat, hat and gloves bent shivering over my sewing machine, but, you know, that sounded less poetic!)

Read More
A Family Bathroom Transformation that is Practical, Stylish and Budget Friendly

When we picked up the keys for our first home 'The Otto House', we had three weeks to get it ready for our little family. At the time Darcey had just turned one, and although a walk in shower with large white plastic handrails and a fold down seat may be welcoming for a weary mama after a long sleepness night, it certainly didn't please me aesthetically or suit our needs as a family bathroom.  Thankfully a builder friend of ours was on hand to help us with the tiling and plumbing so we could crack on and get it finished in the couple of weeks before move in day.We started by ripping out the shower and the awful faux marble plastic surround that had been literally glued onto the tiles beneath it.  Having spent ages trying to take the tiles off the wall around the fireplace downstairs, the thought of more tiles that needed removing (especially ones not factored into our tight time frame) was as unwelcome as a James Blunt song on the radio.  I needn't have worried however as the tiles only required a few forceful taps, a bit of leverage with the chisel and they all fell down, bringing the wall with it!

Read More