
How to paint a checkerboard wooden floor
This is an idea I have wanted to try out for ages. I love a naturally wooden floor, but in some circumstances where the original floorboards have already been painted, or aren’t in the best condition, painting them may actually be a better option.
It’s worth noting that this look does require more maintenance than oiled floors but it can really transform a room. Rather than going with a block colour for our summerhouse makeover, I decided to paint a checkerboard pattern to bring a bit more interest and fun into the space. I’m also hoping the pattern will detract slightly from the scuffs and marks that an outdoor playhouse will inevitably attain over time.
Thankfully, I quite like this look when it’s a bit ‘aged’ too so I am sure I won’t need to repaint it for a while. If you’re interested in giving it a go yourself, here’s a simple step by step guide:
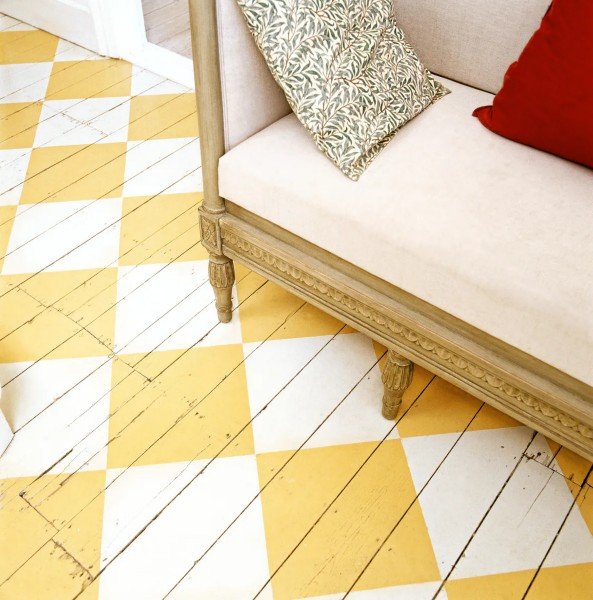
Photo by Johnny Bouchier/GAP Interiors
Tools List:
Good quality primer (I use Zinsser Bullseye 123)
Floor Paint x 2 colours
Electric sander with 80-120 grit
Good quality wood filler
Tape measure
1m ruler
Decorators tape (I use Frog Tape)
Set Square
Craft knife or stanley knife
Pencil
Rubber
Large roller and tray
Small roller and tray
Paint brushes (medium and small)
Step by step guide:
Hoover and clean your floor.
Fill any holes or dents with good quality wood filler.
Sand the floor boards lightly using 60 or 80 grit, followed by 120 grit.
Hoover and clean again.
Paint a good quality primer using a large roller and paint brushes for the corners. Make sure you protect your skirting boards with decorators tape if necessary. I also did two coats of primer but that’s just a personal preference.
Depending on your floorboards, you may find the primer lifts the texture of the wood a little so they could feel a bit rough. If this is the case, you may want to sand again very lightly with 240 grit. As my floorboards had been painted previously though, they didn’t need this step.
Once the primer is dry, paint the lighter of the two colours you have chosen all over the floorboards. I used a medium size brush to cut in the edges and a large roller on the boards. I painted three coats but you may find two is adequate.
Give each coat plenty of time to dry out in between and it’s best to walk on it in socks/bare feet for at least 24 hours afterwards.
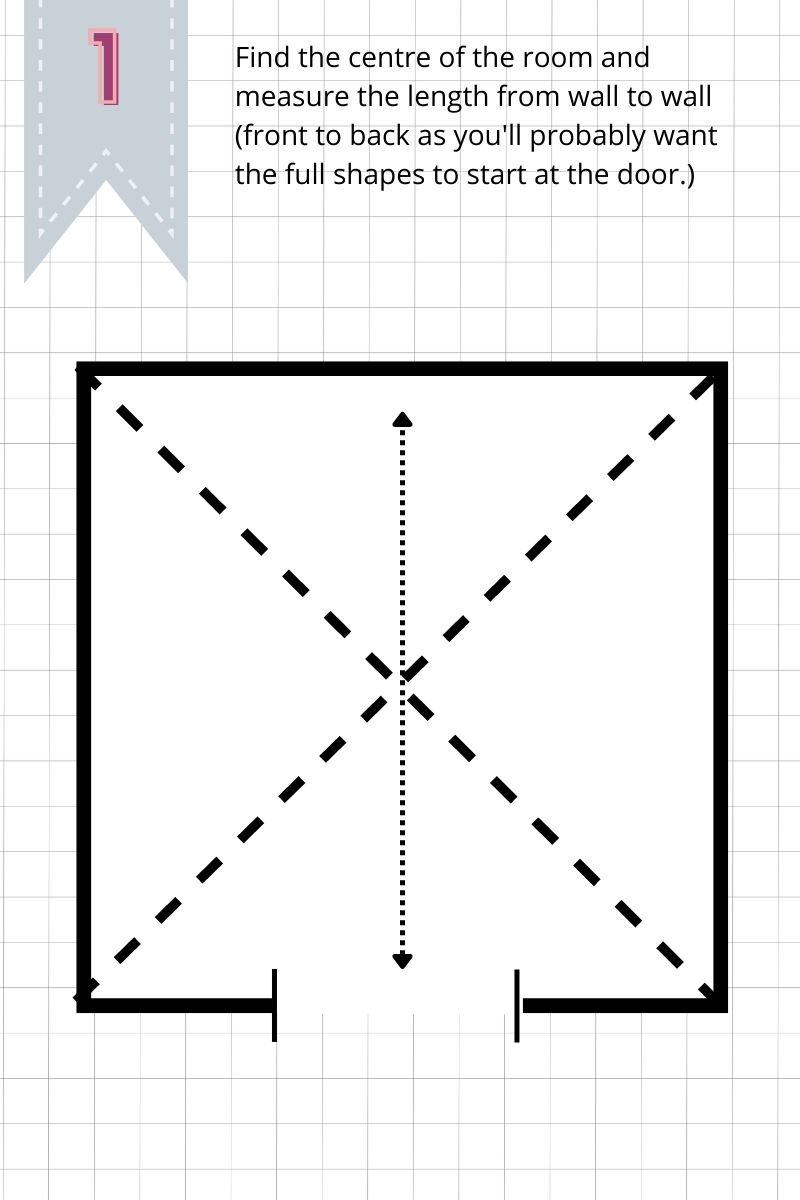
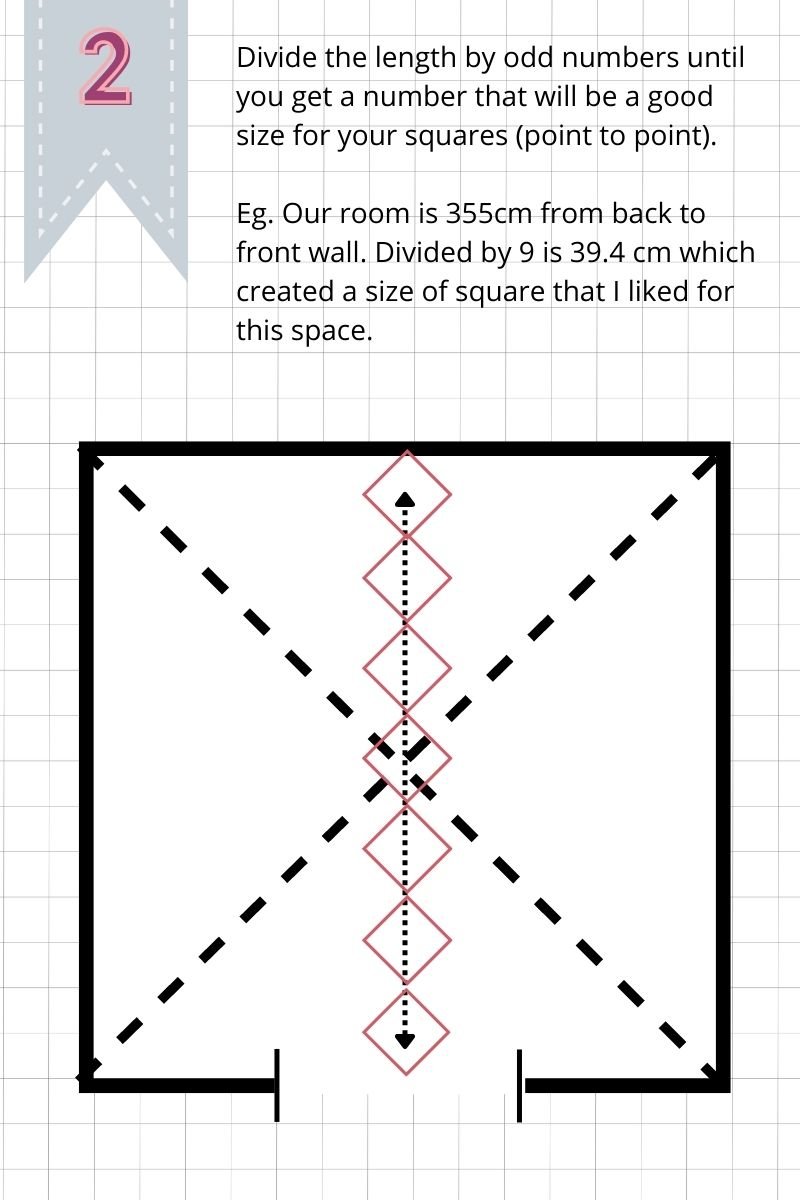
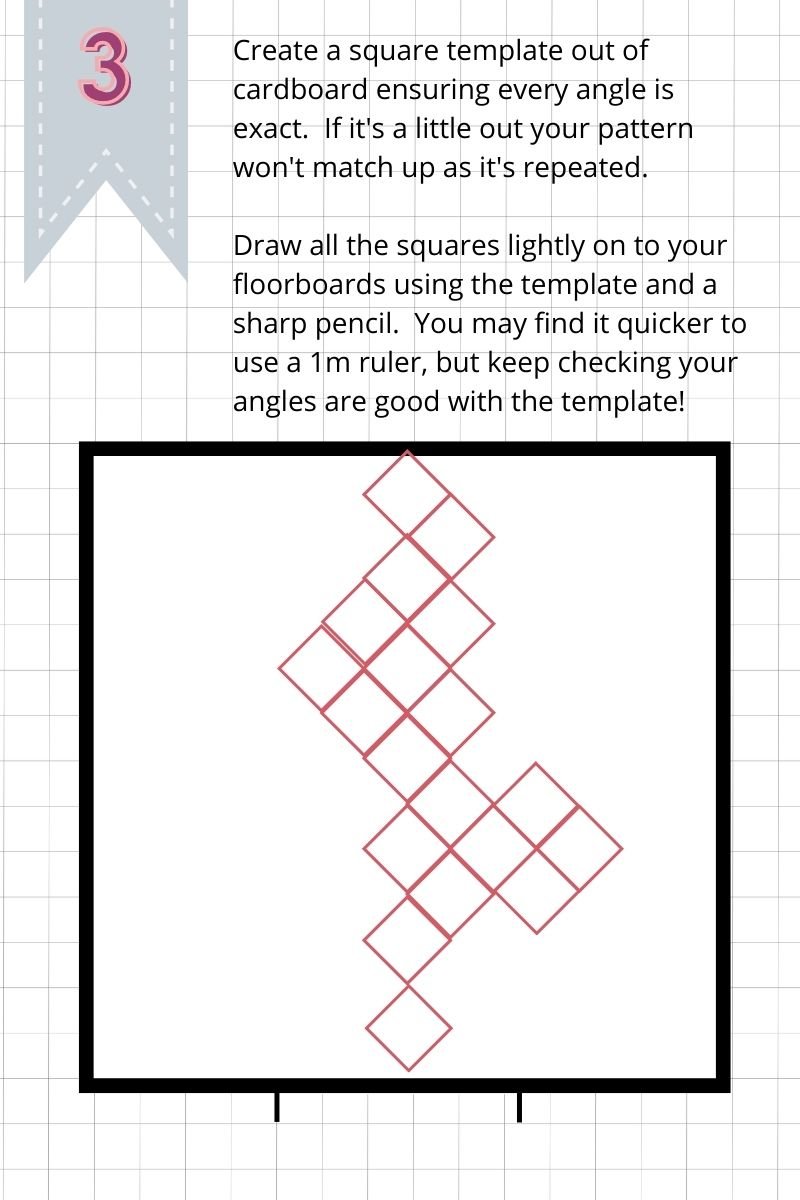
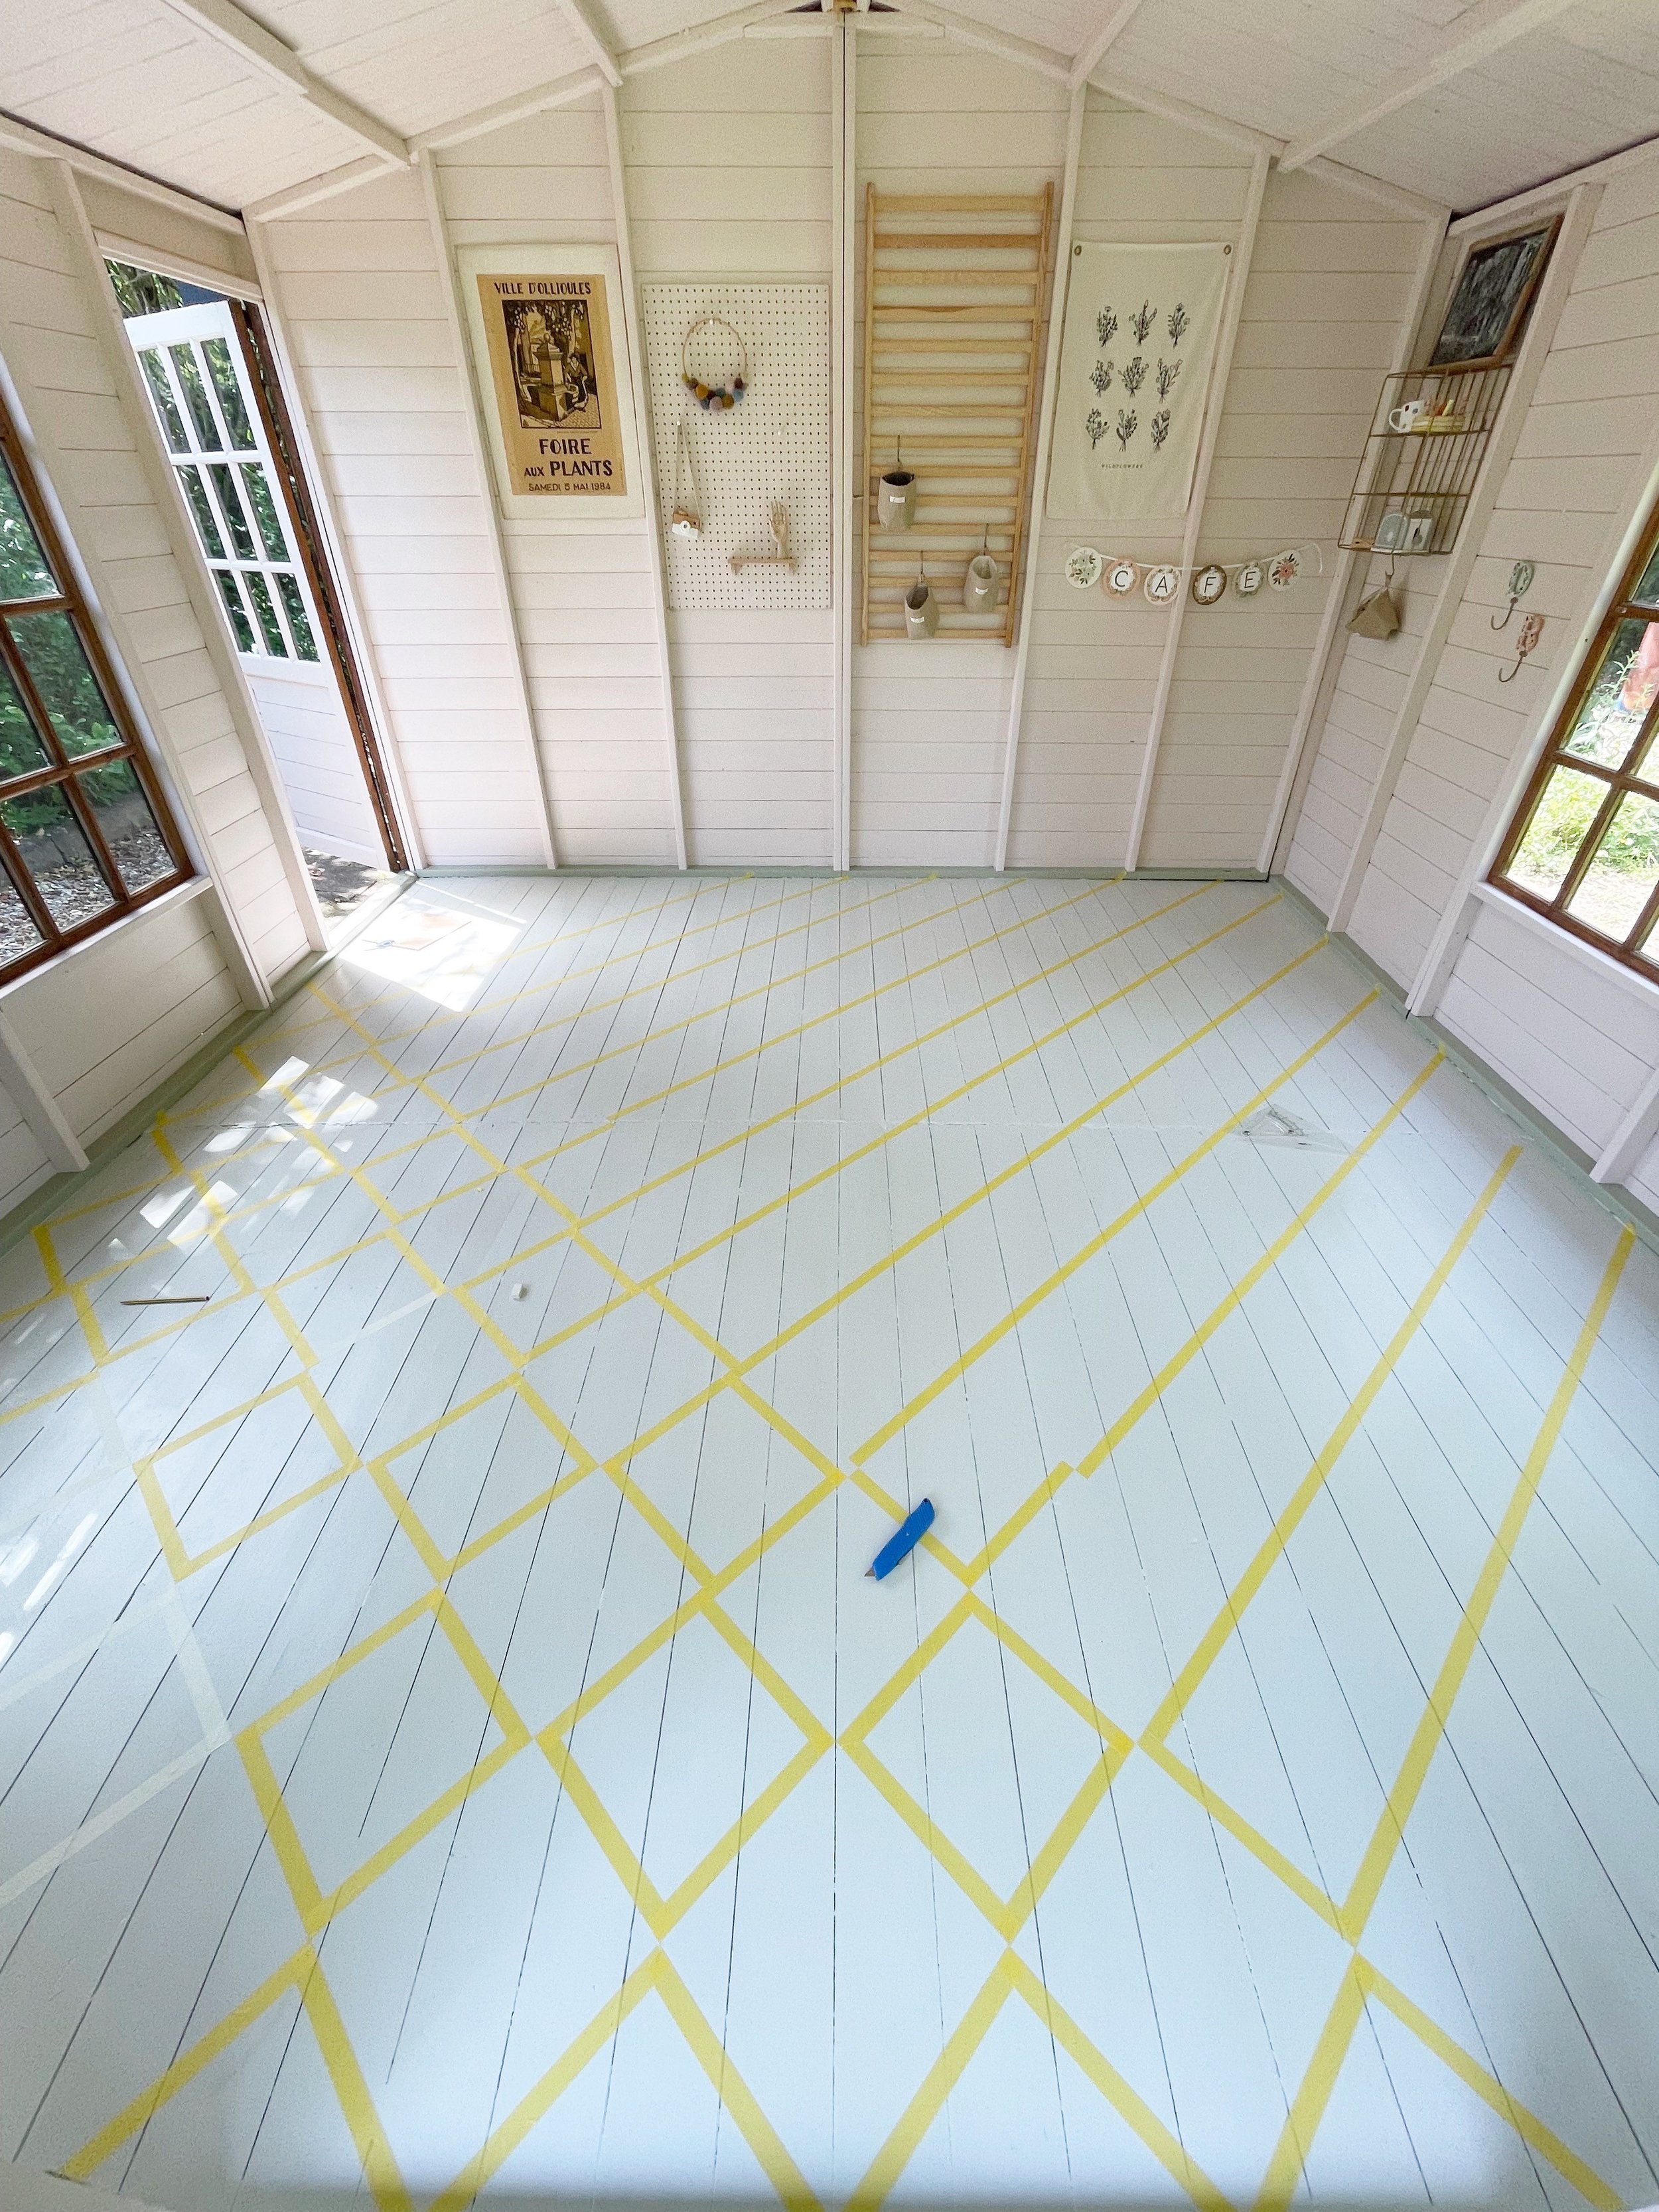
Now for the thinking bit! How big do you want your squares? Have a look at these badly designed diagrams to help visualise it!
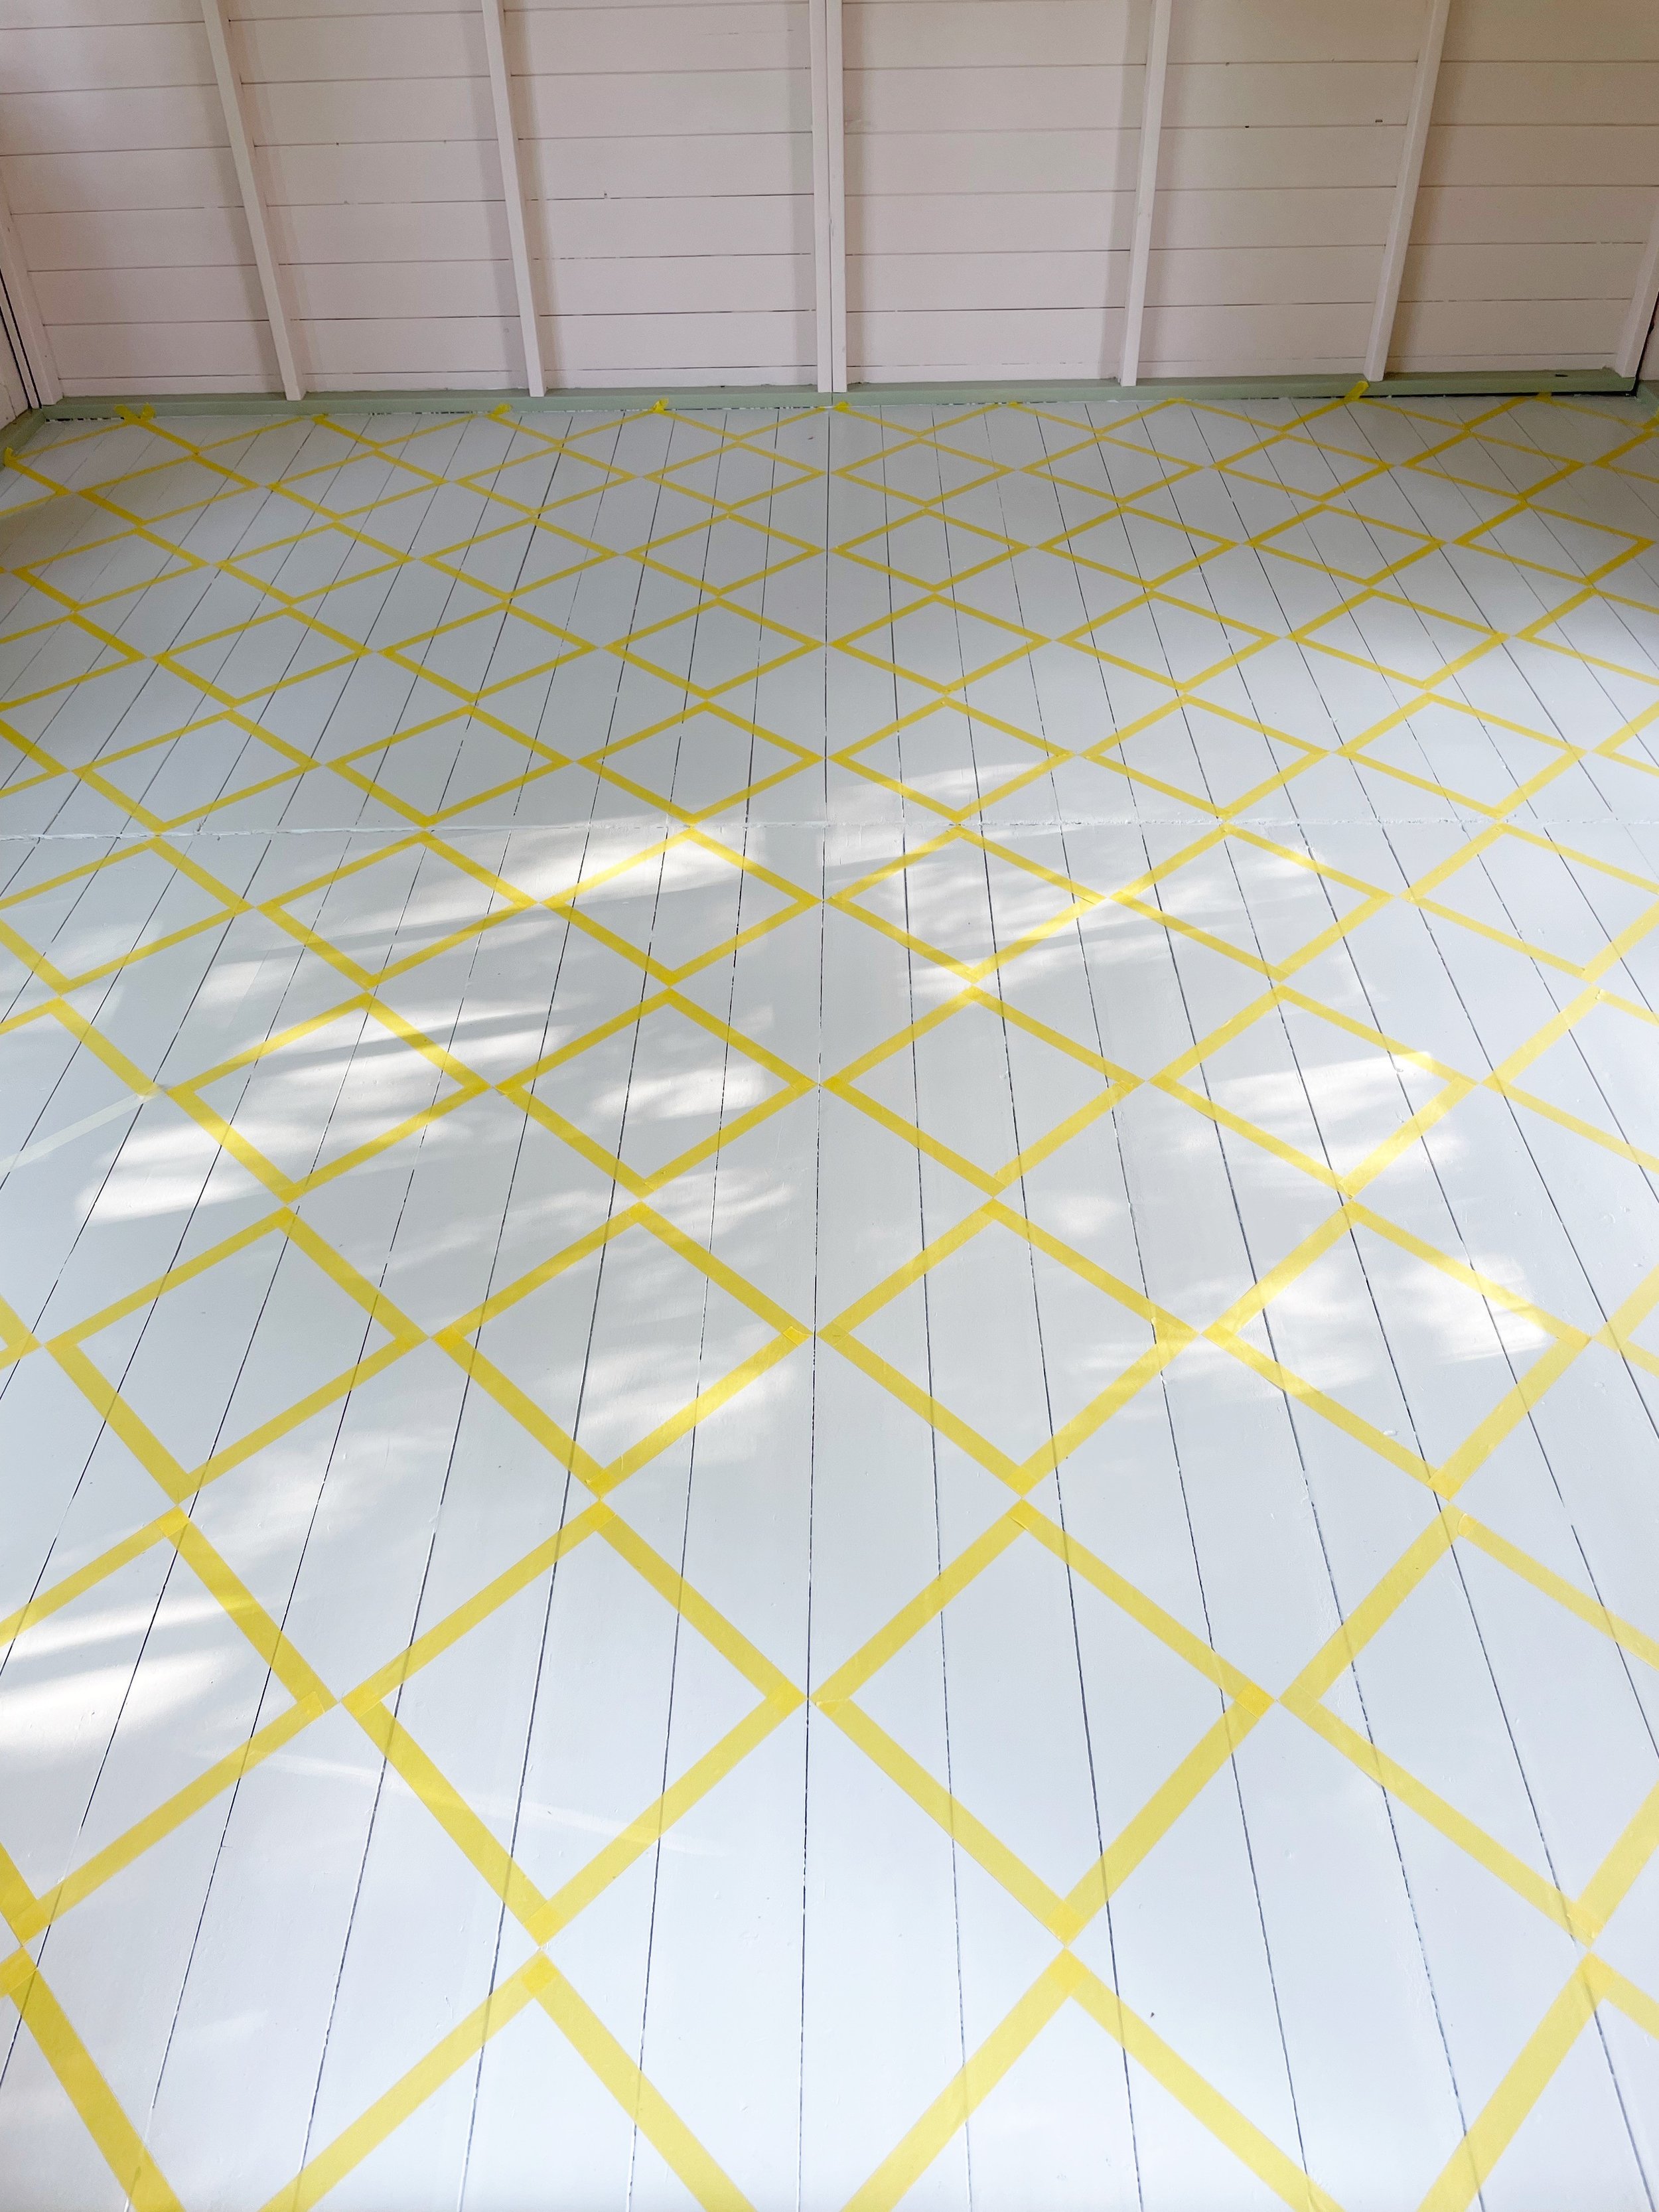
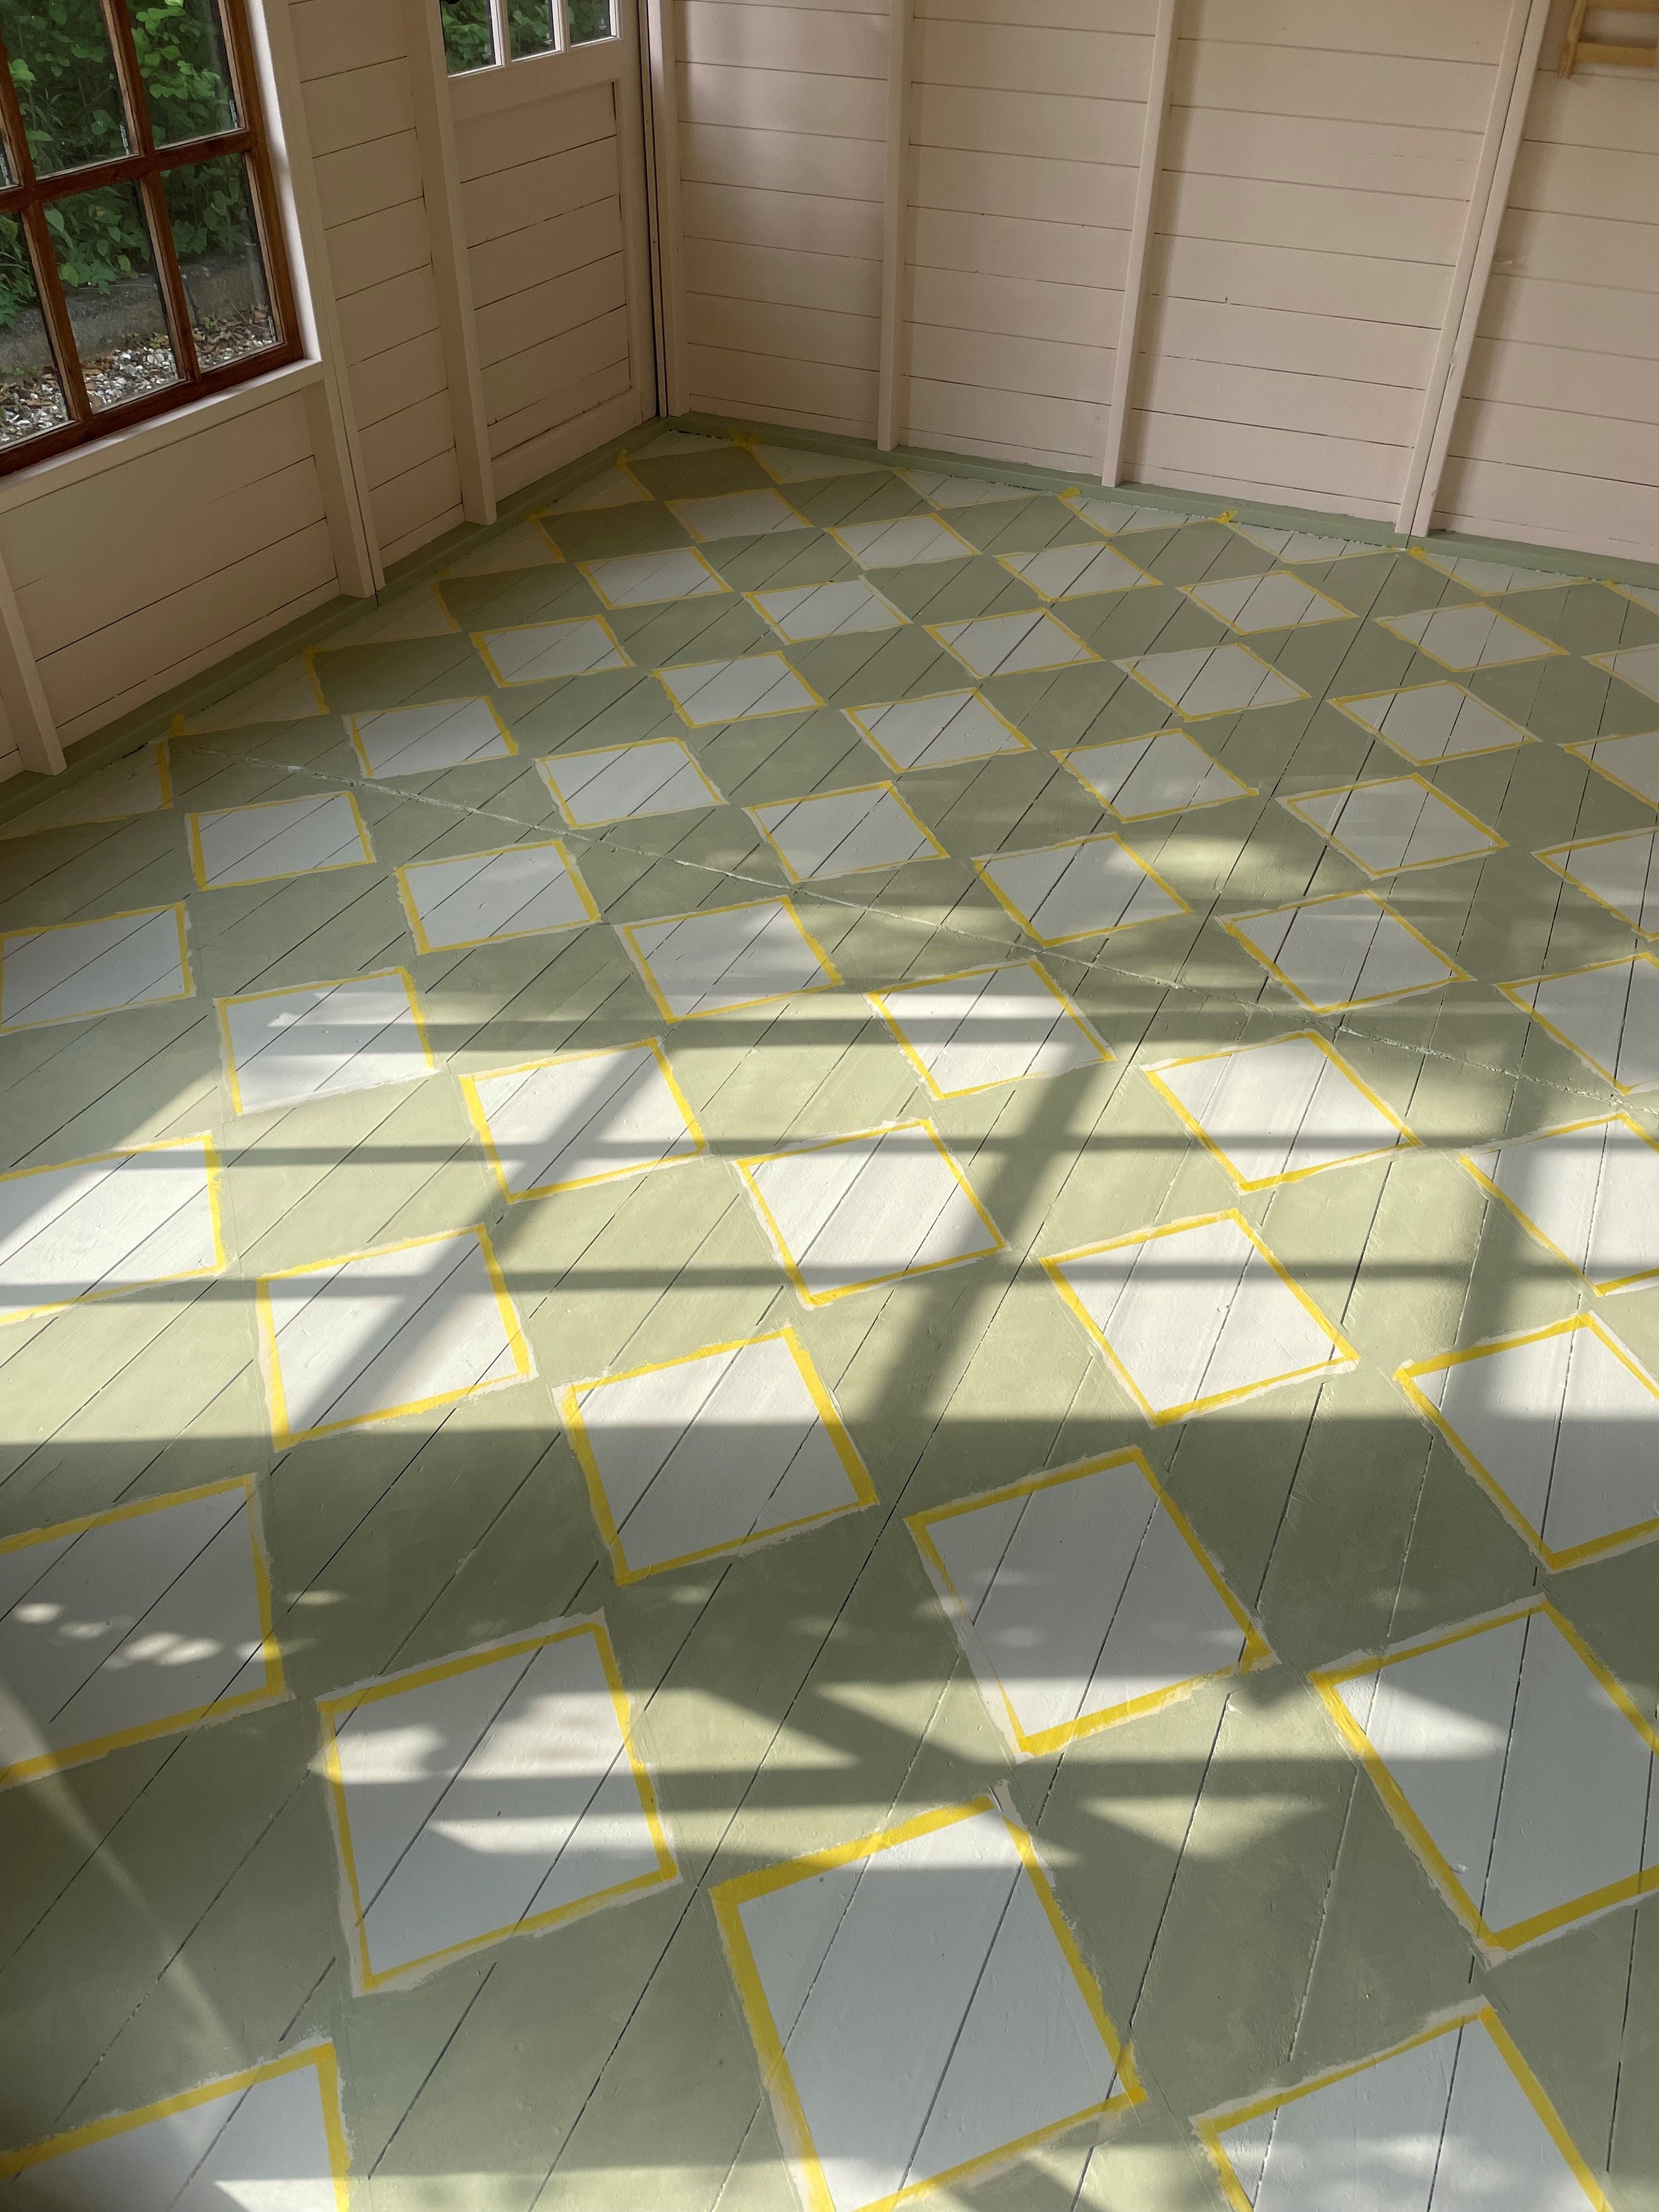
10. Once the pattern is drawn out, it’s time to tape! I used a combination of cheaper nonbranded decorative tape and Frog tape. The Frog tape was so much easier to remove so I definitely recommend splurging on a few rolls of it if you can. (I used 3 rolls for our space.) I am sure as you tape, you’ll find a method that works best for you. Unfortunately because of the pattern, you can’t just tape the lines exactly. If you do that you will have a gap between every square. If you want each point to touch like mine, you will need to alternate the tape so it runs down the edge of the line (not central over it).
Please note: I found it quickest to place the tape in one line, and then cut each section out and move it so that it alternates to make the squares. You may find it quicker to just do one square at a time.
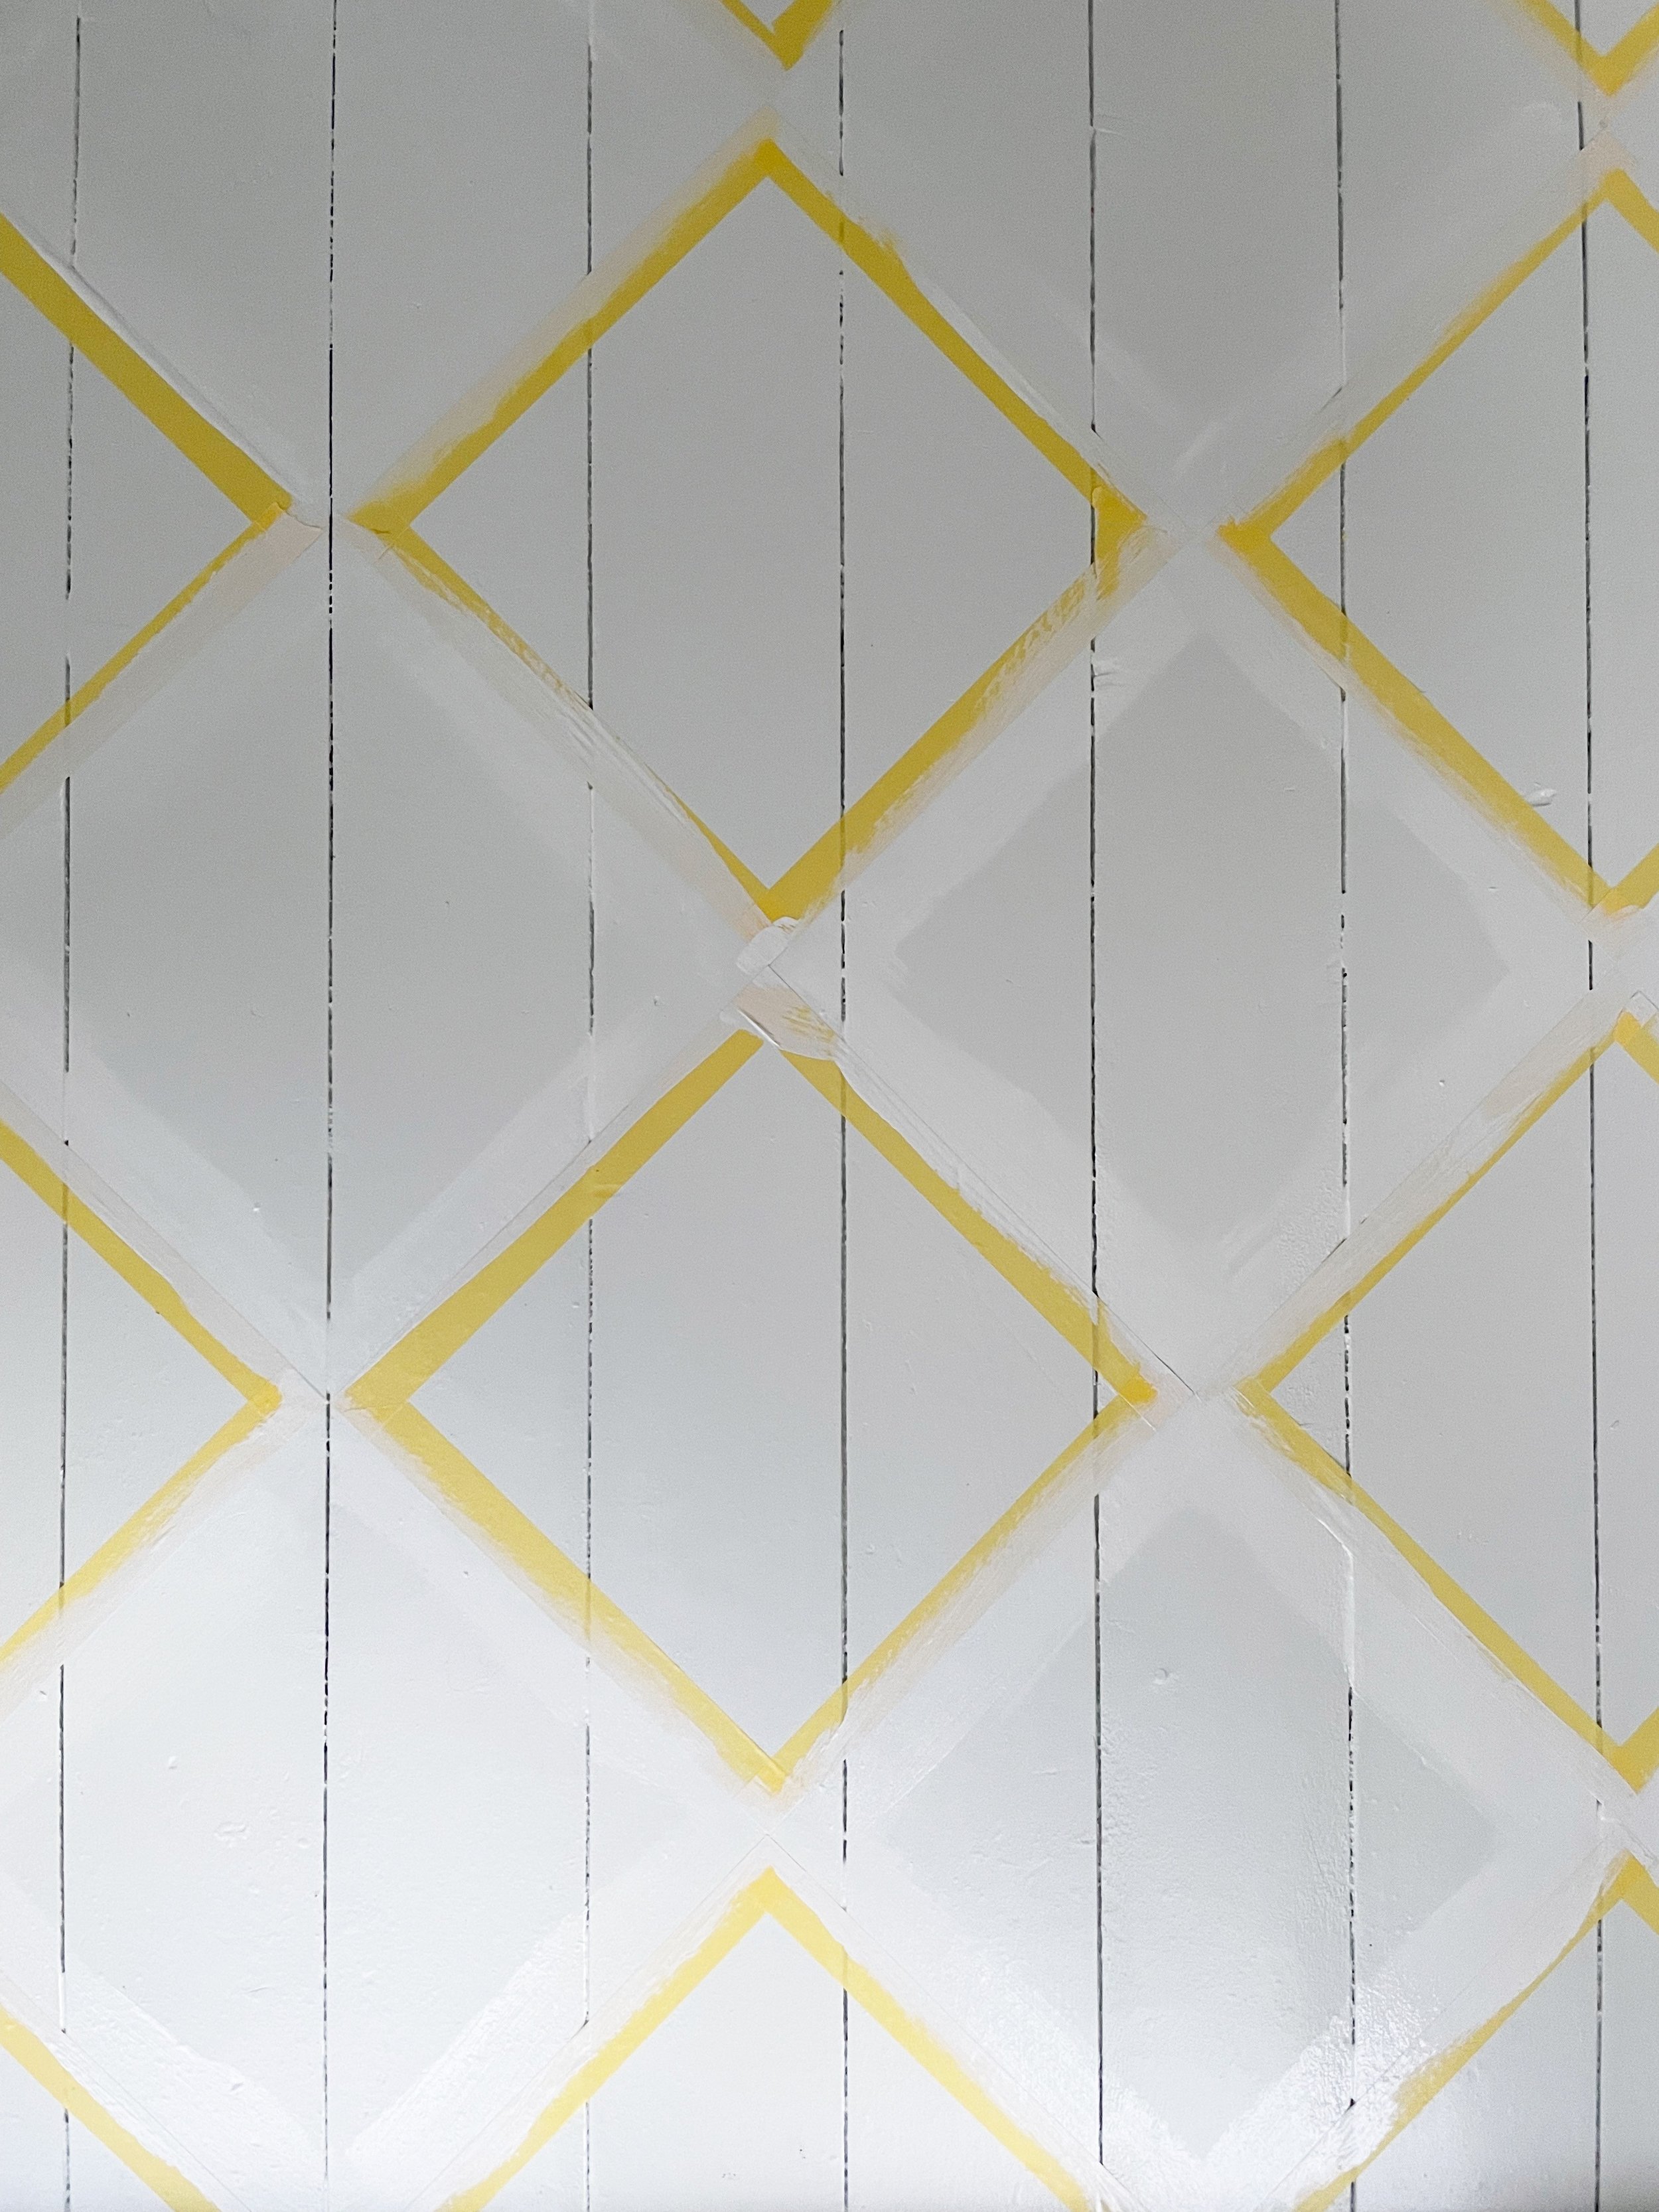
11. Next, it’s time to seal the tape. This is a really important step if you want crisp lines when you remove the tape. With a paintbrush, paint over the edges of the tape using your lighter base coat. The paint will find any gaps in the tape and bleed underneath it, which doesn’t matter as it’s the same colour as the base coat anyway. Then when you paint the contrast colour on top, any areas that would have bled will have been sealed by the base paint that you brushed on.
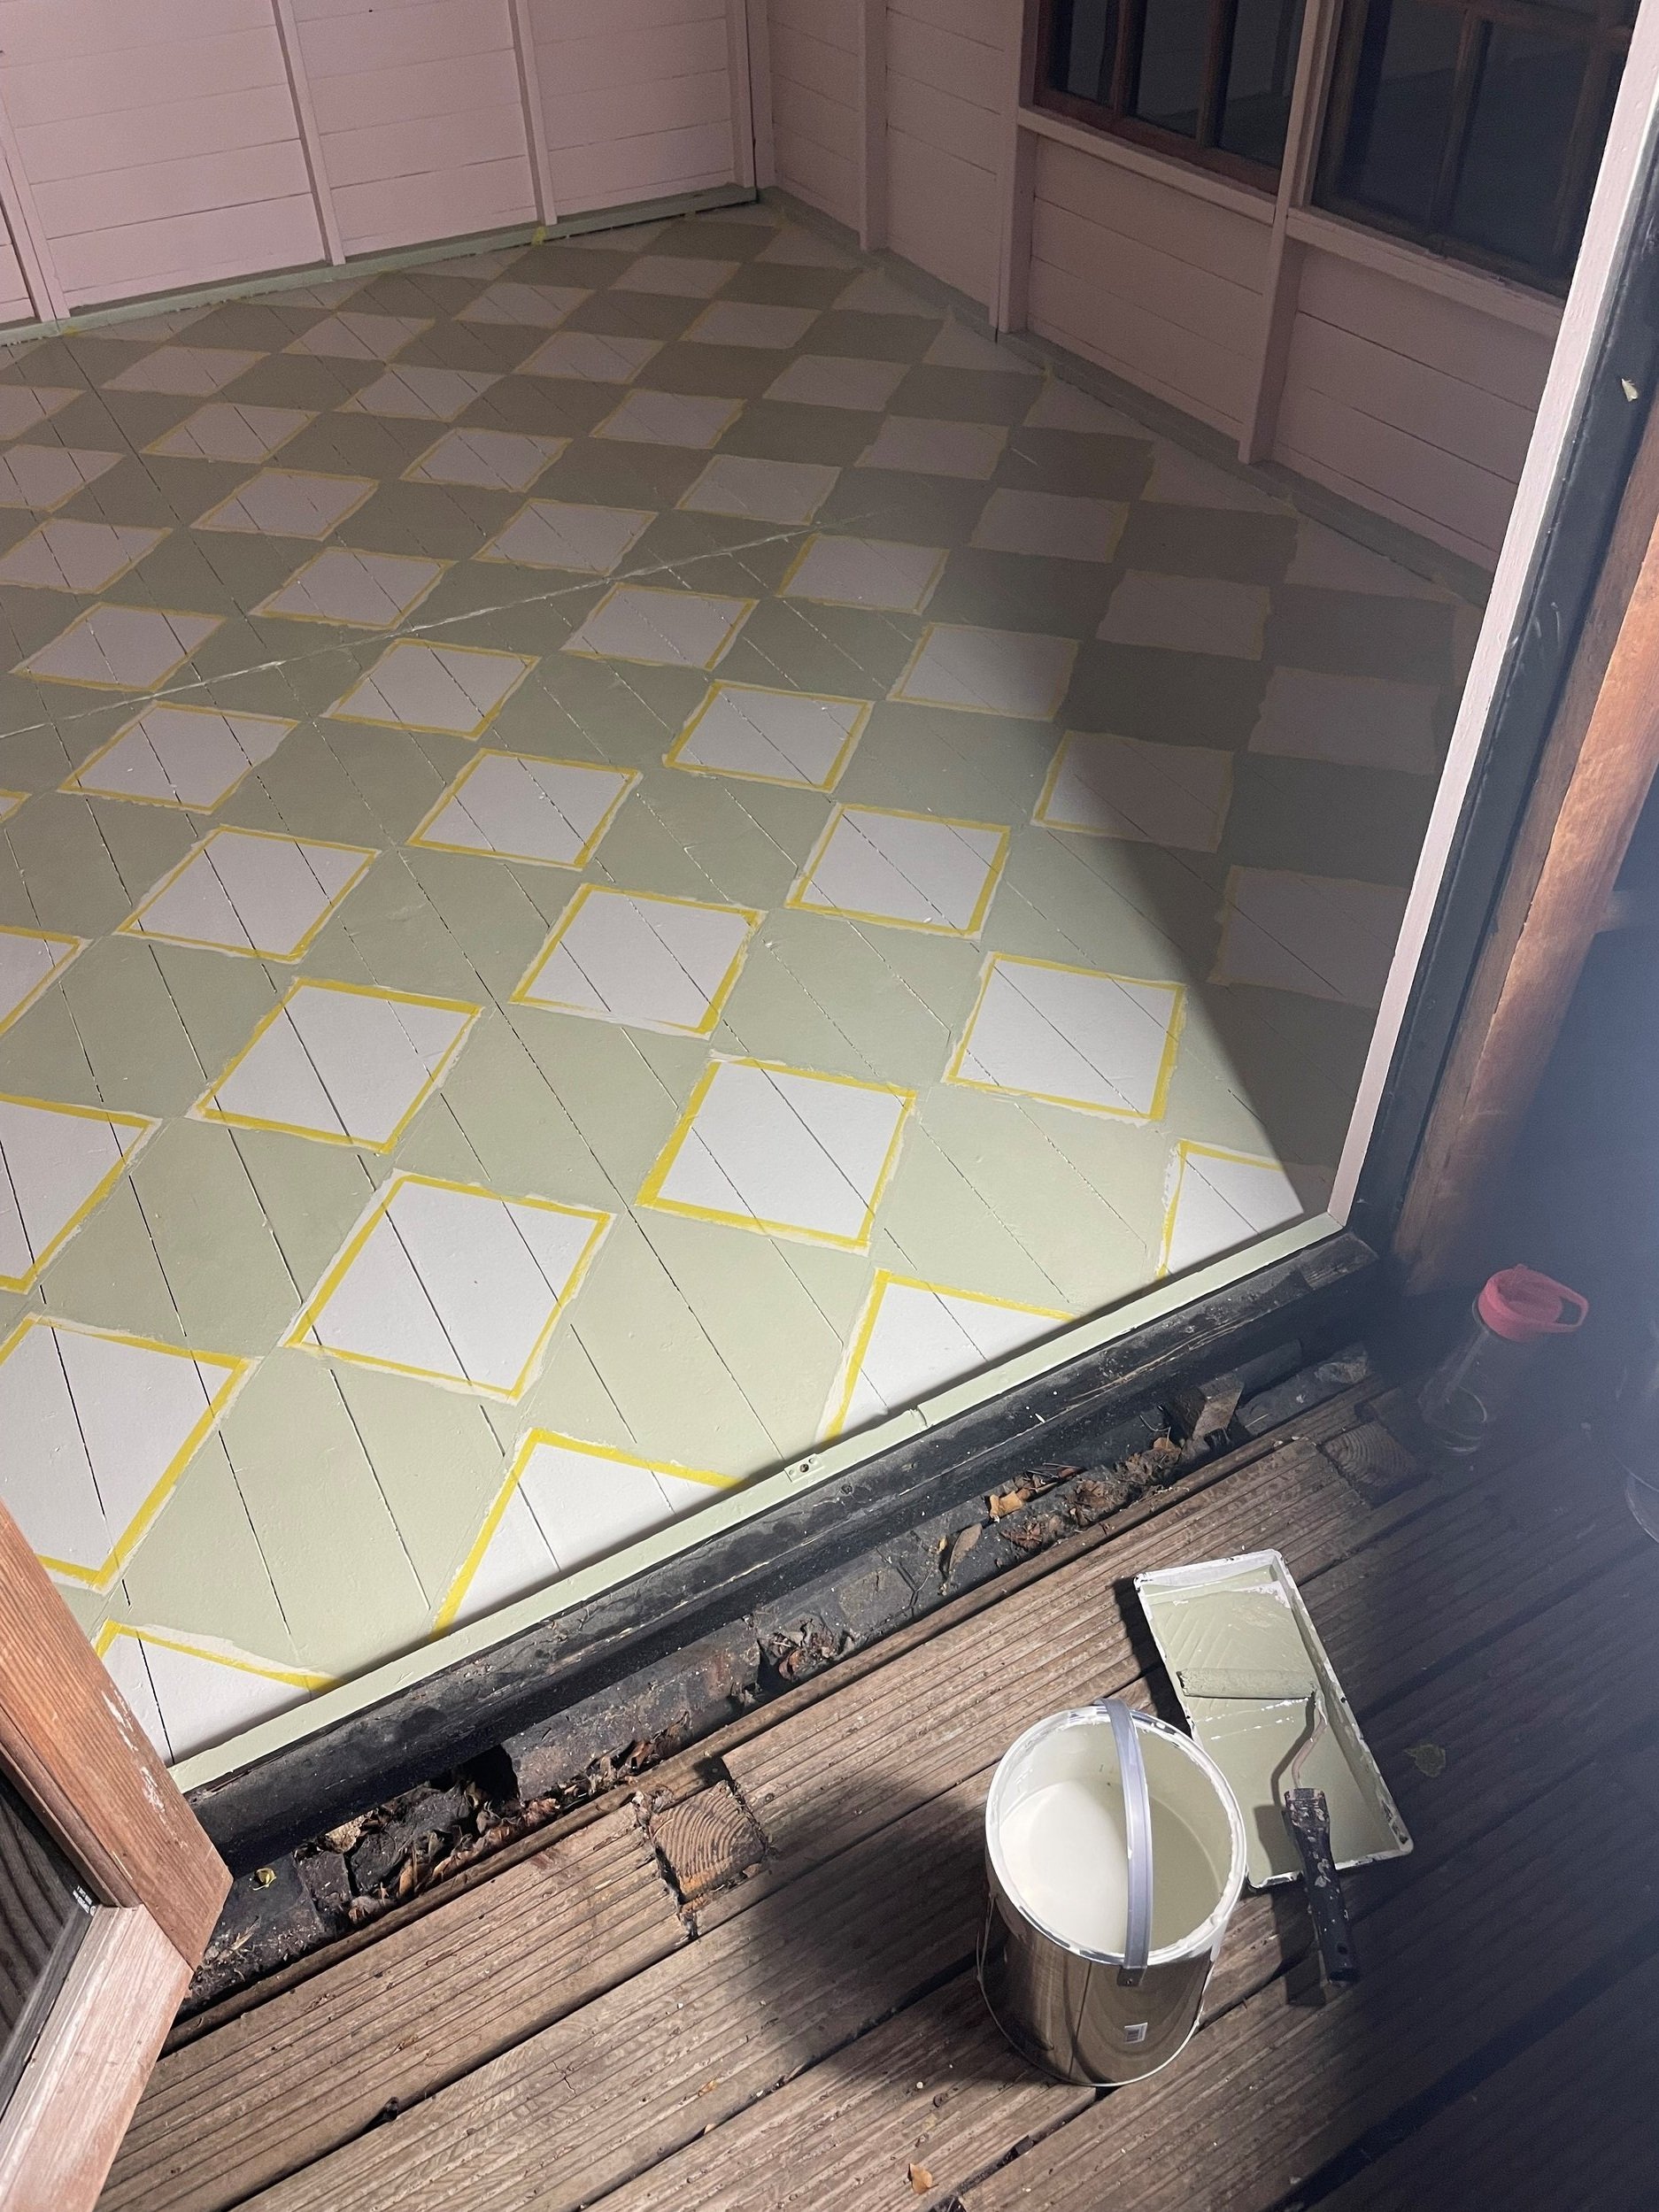
12. Use the small roller to paint the top coat once the seal has dried. I did three coats.
13. Remove the tape as soon as you can (it works best to remove it when the paint hasn’t completely dried).
14. Touch up any areas that have smudged or bled through with a small paint brush. I found this only happened in a few areas and generally it was where there were large gaps in the floorboards. Good luck!
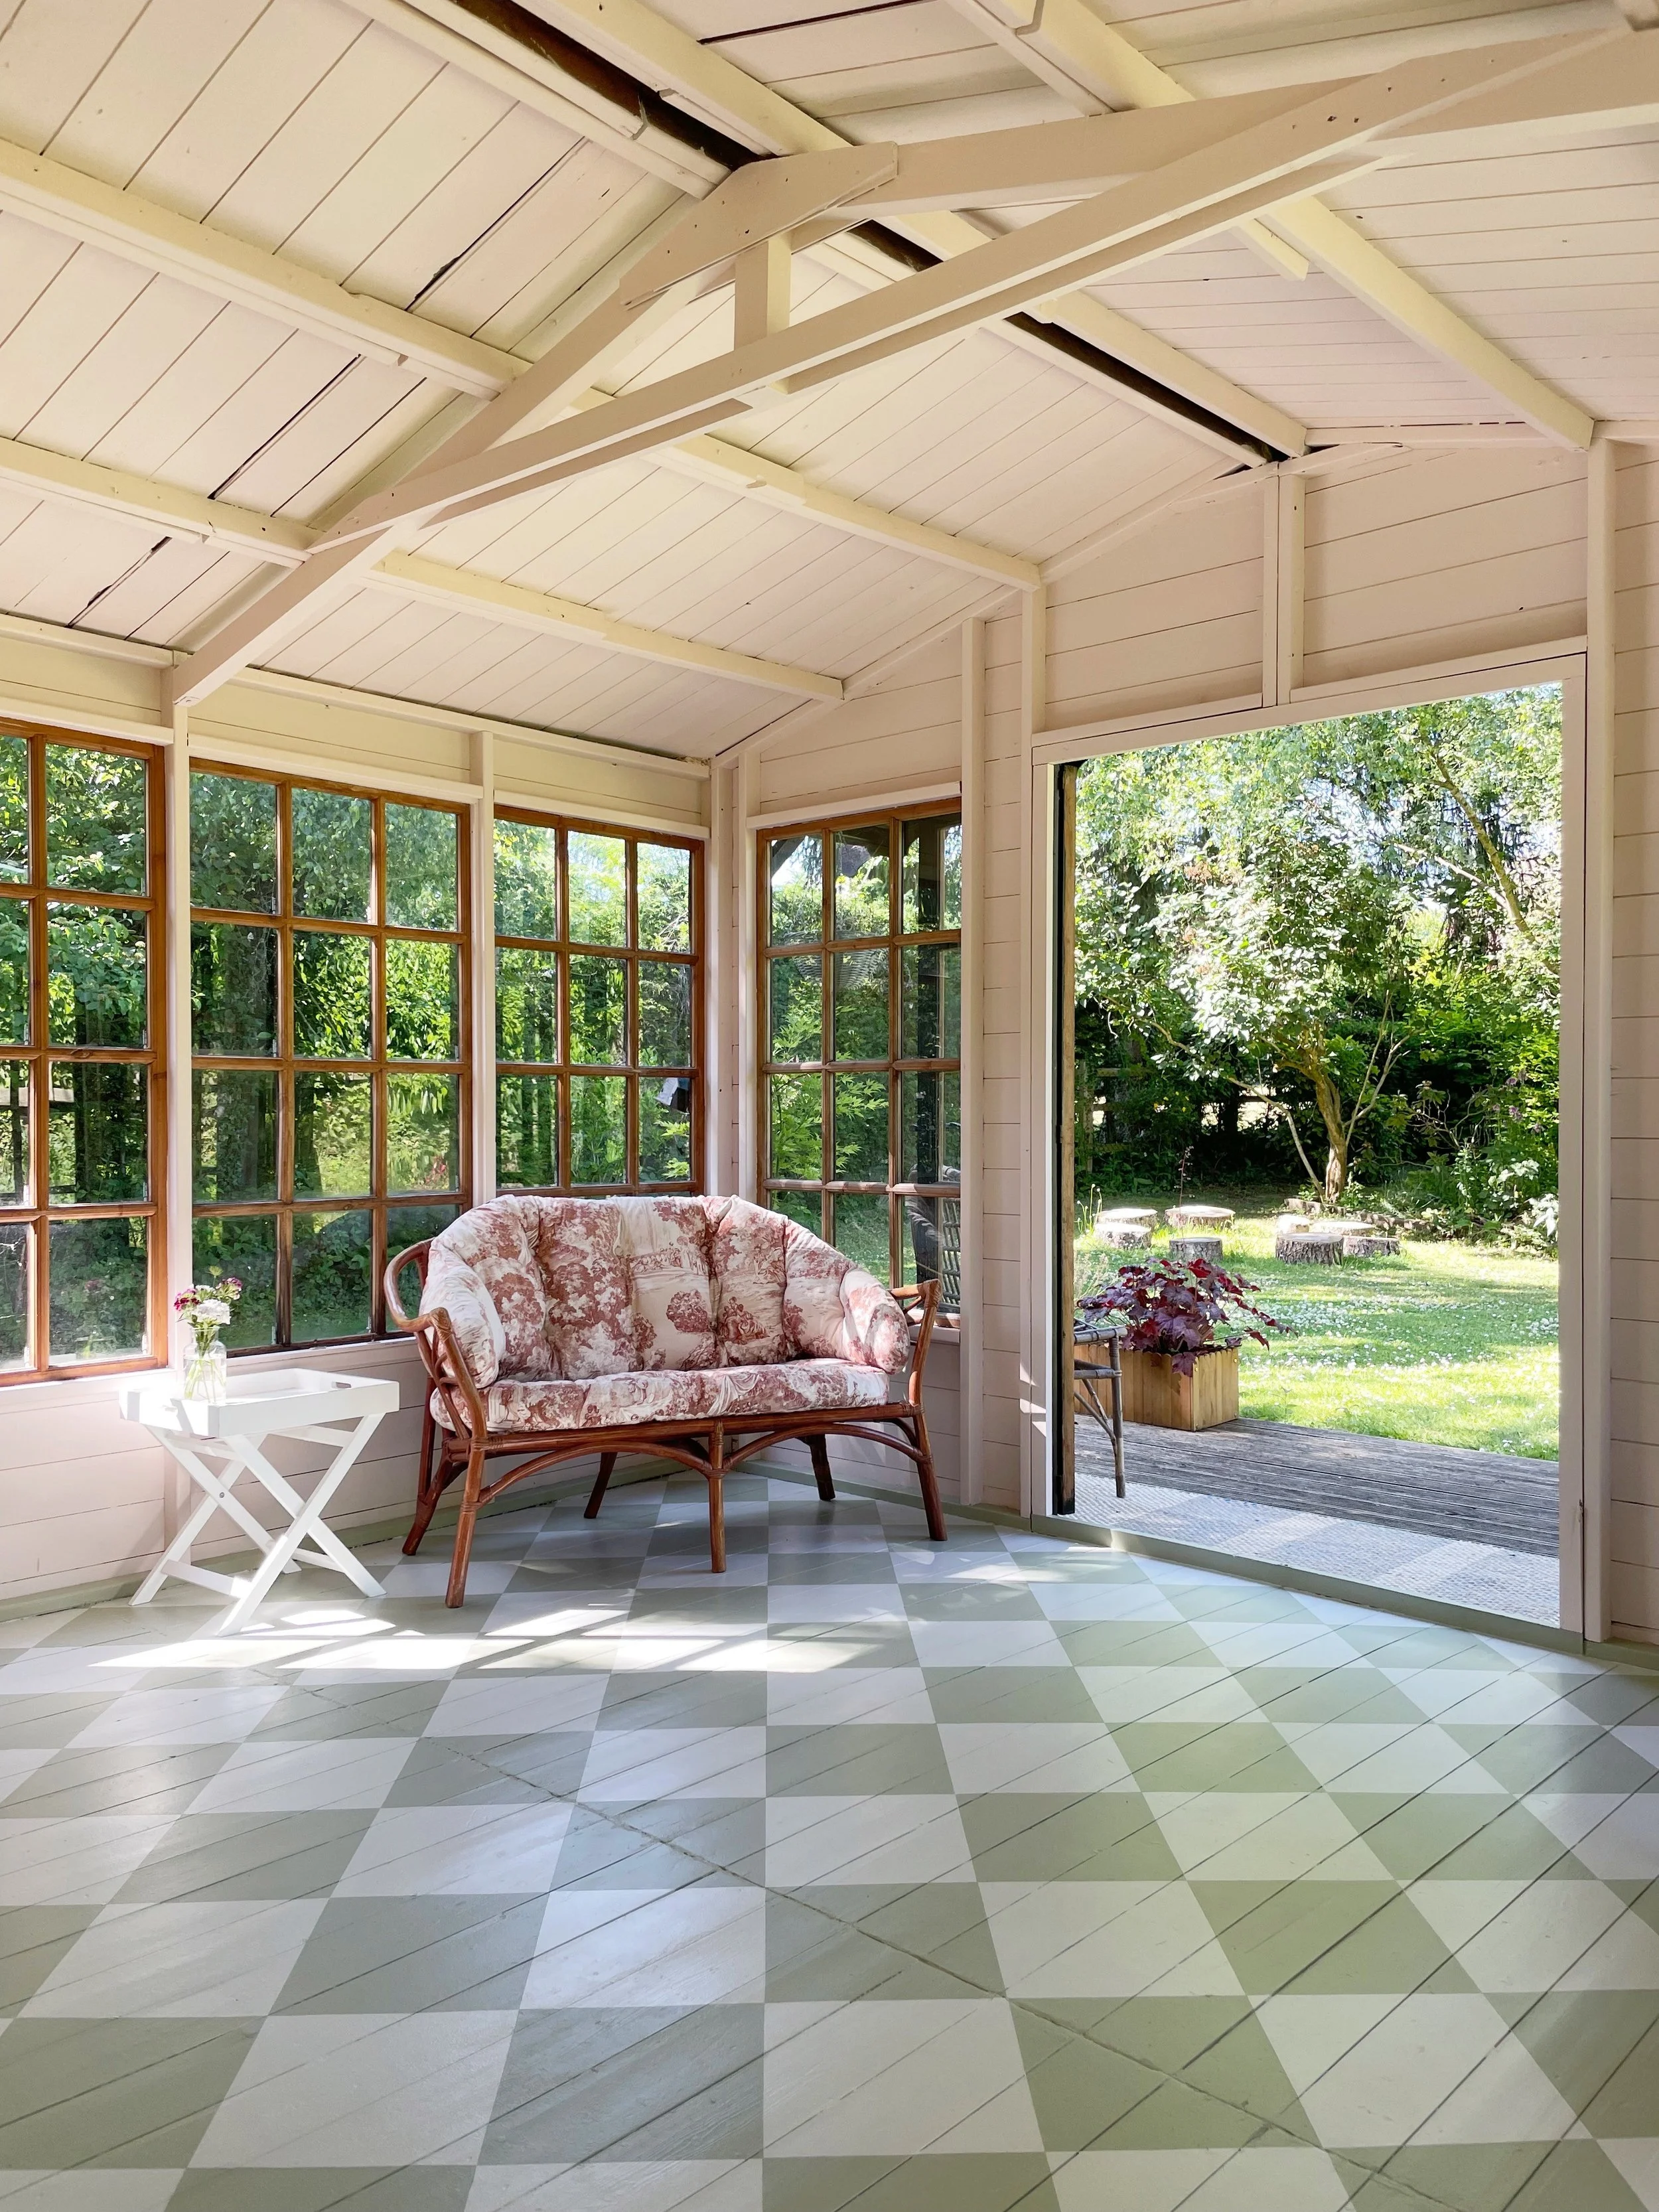
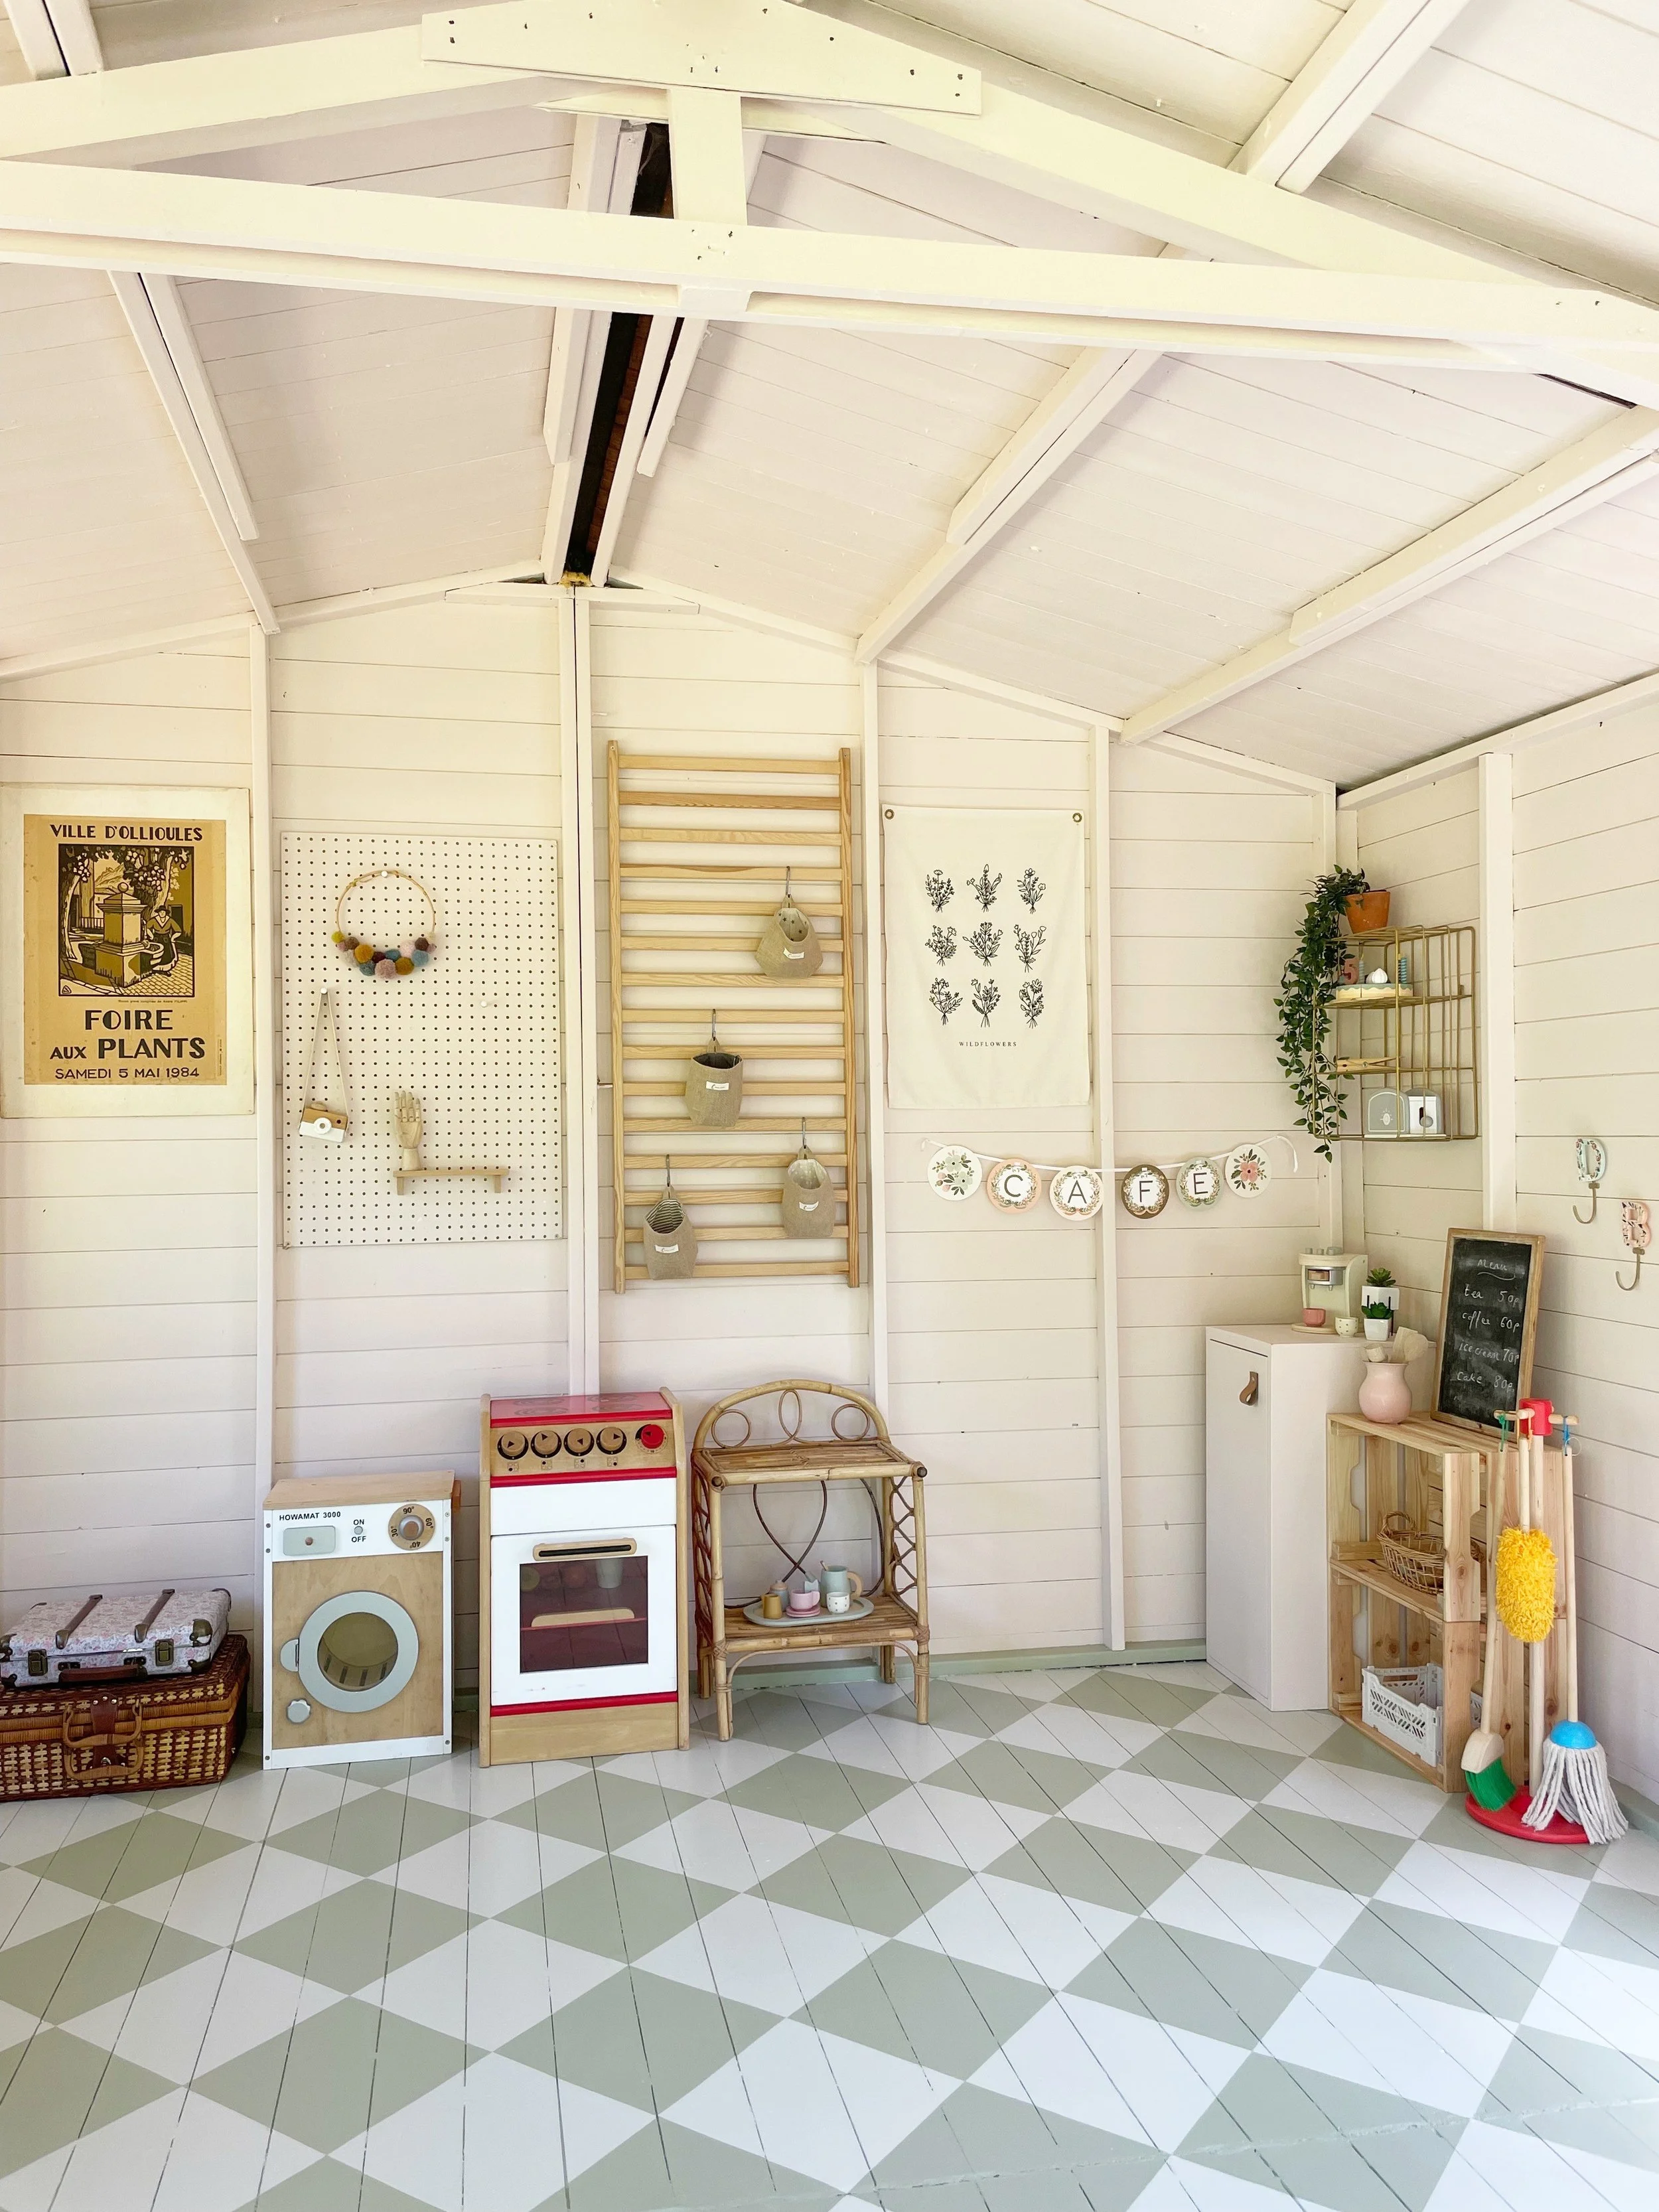

And that’s it! It’s certainly a DIY that requires a lot of patience but it’s always worth it in the end. Pop a good podcast or audiobook on and you may even find the repetitive process relaxing! 😉